Computers make our lives easier, but our digital devices don’t come without problems. Occasionally, software acts up, hardware breaks down, and our Macs require a little extra care.
When something does go wrong, the first step to fixing the issue is isolation to find out whether you’re dealing with a software or hardware problem. Here, we’ll discuss the steps you can take to isolate almost any software or hardware error with your Mac.
Software vs. Hardware Issues Explained
Software and hardware issues require different solutions, and knowing what you’re dealing with is crucial to remedying the situation.
Software issues can include:
- Apps failing to launch
- Persistent error messages
- Apps or OS not behaving as expected
- Mac failing to complete the boot process
- And more

Hardware issues can include:
- Erratic trackpad behavior
- Persistent display issues
- Keyboard keys not working
- No power
- And more
In reality, some software problems listed could be hardware related and vice versa, which is why isolation is important. If, through troubleshooting, you identify a software issue, you can generally remedy the situation yourself.
Hardware, however, could require an expert repairer. Although you can swap out some items yourself, such as power cables, peripherals, and certain internal components. For example, you can easily upgrade or replace RAM in some Mac models.
Before performing any troubleshooting steps you should always backup your data and ensure that all software is up to date. Sometimes a software update is enough to resolve an issue.
1. Identify Any Recent Changes to the System
When something suddenly goes wrong, you should ask yourself what changed. Did you install a new app, alter a setting, add a peripheral, or drop your device down a flight of stairs? Any of these scenarios could be the cause of a recent problem.
To isolate further, you can:
- Uninstall a suspect application
- Revert any altered settings
- Remove all unnecessary peripherals, such as external drives and cameras
- Undo any other recent changes to the system

Often, we see a clear cause-and-effect relationship between a specific action and the emergence of an issue. Unfortunately, identifying the source of a problem isn’t always that easy.
2. Run Apple Diagnostics
If you’re troubleshooting an issue that has the hallmarks of a hardware malfunction, Apple Diagnostics—formerly Apple Hardware Test—is a useful tool. On completion, the test will either give the all clear or provide an error code that you can check against Apple’s database to identify your specific issue.
The steps for running Apple Diagnostics are simple:
- Shut down your Mac.
- Remove all unnecessary peripherals.
- Connect your Mac to power.
- Ensure that your device is on a flat, stable surface with good ventilation.
- For Intel Macs, turn on your device and hold the D key until a progress bar appears. For Apple silicon Macs, hold the Power button until the startup options screen appears. From here, press Cmd + D, and the diagnostic program will load.
Once the test completes, you’ll know if your Mac has any obvious hardware issues.
3. Boot to Safe Mode
Safe mode is an excellent way to identify the source of a problem. The boot mode prevents startup items and caches from loading, which can help isolate issues caused by those items.
To boot to safe mode on an Intel Mac, simply hold the Shift key during startup.
On an Apple silicon Mac, the process differs:
- Hold the Power button until the startup options screen appears.
- Click the startup disk—usually Macintosh HD—to select it.
- Hold the shift key so that Continue in Safe Mode appears beneath the drive icon.
- Click Continue in Safe Mode.
Due to a disk check during startup, safe boot takes longer to load than normal, so there’s no need to panic if the progress bar is dragging along. When booted, you’ll see Safe Boot written in red in the top-right corner of the screen.

If safe boot resolves the issue, an item launching during startup or login is likely causing the problem. To remedy, you can try removing login items and other launch agents from the system. Additionally, clearing the system cache folders is an effective step when safe boot solves an issue.
4. Test in a New User Account
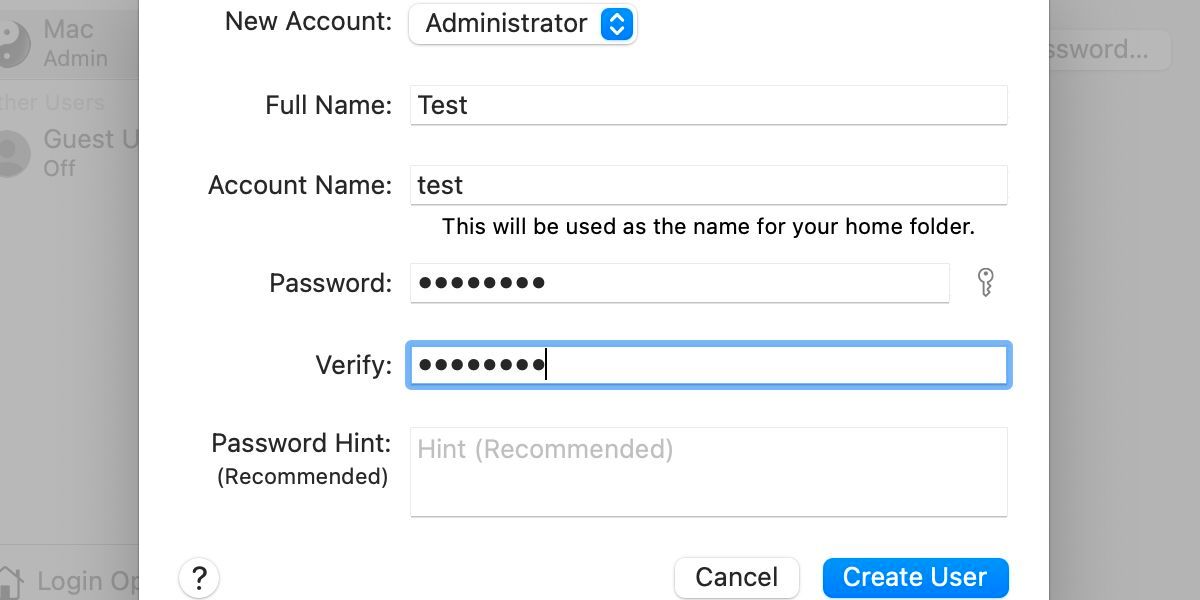
If the problem persists, you’ll need to determine if the issue is system wide or if it only affects a single user. The best way to do this is to create a new admin user account, which you can delete when you’re done.
The steps to create a new admin account are as follows:
- Go to System Preferences > Users & Groups.
- Unlock the Padlock.
- Click the plus (+) button.
- Choose the Administrator account type.
- Fill in additional details and click Create User.

You can now log out of your current user and into the new admin account. If the problem persists, you’ll know the issue extends to the entire system. If resolved, you’ll need to determine what in your original user account is to blame.
5. Boot to the Recovery Partition
The recovery partition provides an area outside of the main OS to troubleshoot system-wide issues. In almost all instances, a software glitch won’t extend to the recovery space. If, however, the problem continues here, you’re likely dealing with a hardware malfunction.
To boot to recovery on an Intel Mac, simply hold Cmd + R during startup.
The process on an Apple silicon Mac is as follows:
- Hold the Power button until the startup options screen appears.
- Select Options.
- Click Continue.
From the recovery partition, you can troubleshoot basic system-wide issues relating to sound, keyboard and mouse, graphics, Wi-Fi, and more. You also have access to Safari, which can help with isolating web-related problems.
As mentioned, an issue that extends to the recovery partition is likely to be hardware related and may need a repair to remedy. Apple Diagnostics is a great tool, but it doesn’t always pick up every problem, and some devices will require further analysis.
What Happens After Isolation?
At times, our software and hardware can fail us. When trouble does strike, knowing how to isolate an issue is important. Often, the cause of a glitch is a recent change, and identifying any new system alterations can help isolate the problem.
For hardware issues, Apple Diagnostics is an effective tool. But when it comes to software, safe mode and a new admin user account can help isolate many problems. Additionally, the recovery partition is useful for troubleshooting system-wide glitches.
A confirmed hardware malfunction means either a DIY repair or professional service, depending on the circumstances, and the most stubborn software issues can require a full system reinstall. Nonetheless, isolation is the first step to solving any problem.


