The Windows Registry is your system's storeroom where all software and system configuration is stored. Whenever you try to troubleshoot an error, you often see tutorials talk about modifying, adding, or deleting a registry key.
However, sometimes you hit a bit of a snag when you're trying to modify, delete, or add a registry key. As such, here's how to take ownership of the registry in Windows 10 so you can make the changes that you want to make.
Why Is the Registry Stopping You From Making Changes?
Windows 10 doesn't want you to inadvertently make changes that could harm your system. Even if you're an administrator, you don't have permission (at least by default), to modify or delete certain keys.
In most cases, you're better off not messing around with registry keys that you don't have permission for. If you have reason to believe something in the registry is causing a problem, you can always reset the registry to fix errors.
However, if you're trying to manually configure a system component and you're confident that you have the technical knowledge to determine that what you're doing won't harm the system, you may want to take full permission of registry keys.
Take Full Ownership of Windows Registry from Registry Editor
Before you make any modifications to the registry, it's a good idea to backup your registry. This means that if you end up deleting the wrong thing, you can quickly and easily get things back to normal.
Once you're done, open the Registry Editor by pressing Win + R, typing regedit, and pressing Enter.
Look for the registry key you want full permissions for. For illustrations, we've used the Windows Defender key:
ComputerHKEY_LOCAL_MACHINESYSTEMCurrentControlSetServicesWinDefend
Right-click on the key and select Permissions.

On the Permissions window, select Advanced. This will open the Advanced Windows Security Settings. At the top of the window, you'll see a Change option besides the Owner of the key.
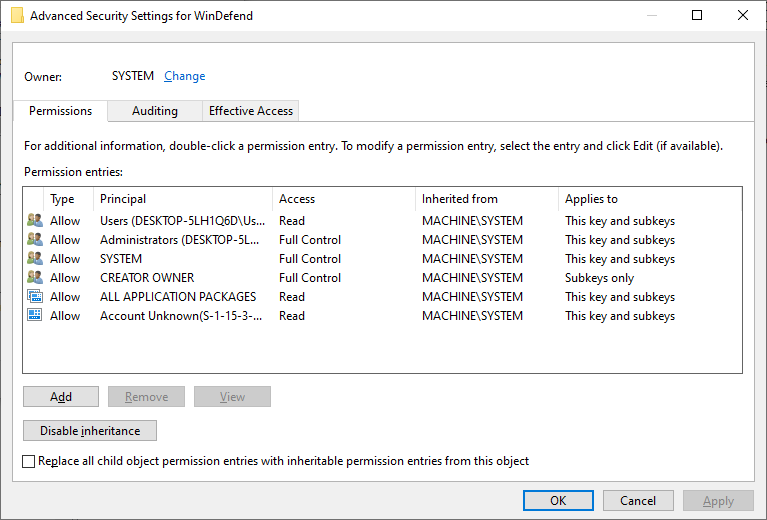
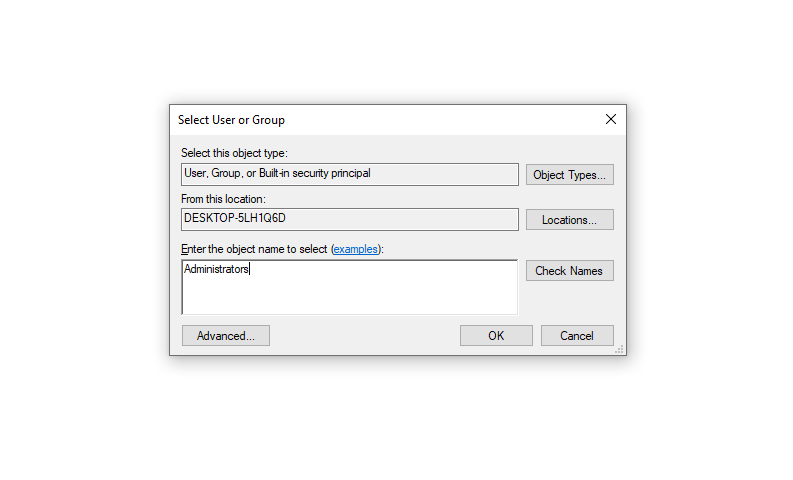
Click on Change to change the owner. Type Administrators in the Enter the object name and select field and press OK.
This will take you back to the Advanced Security settings. Double-click on Administrators from the list of Permission Entries. Select the checkbox besides Full Control under Basic permissions and press OK to save changes and exit.

You're all set at this point. Once you've completed this process, go ahead and modify the key as you choose and you'll be able to. However, if you feel this is a bit overwhelming, you can also use a third-party tool to make this process simpler.
Taking Full Ownership of Windows Registry Using a Third-Party Tool
A third-party tool like RegOwnit can make this process simpler for you. Download RegOwnit and launch the app. Of course, you should still make a backup of your registry even if you're using the app.
Once you've launched the app, add the registry address for the key you're trying to take full ownership of. Next, select the User Accounts you want to give full control to, and select the Full Control button in the Permissions section.
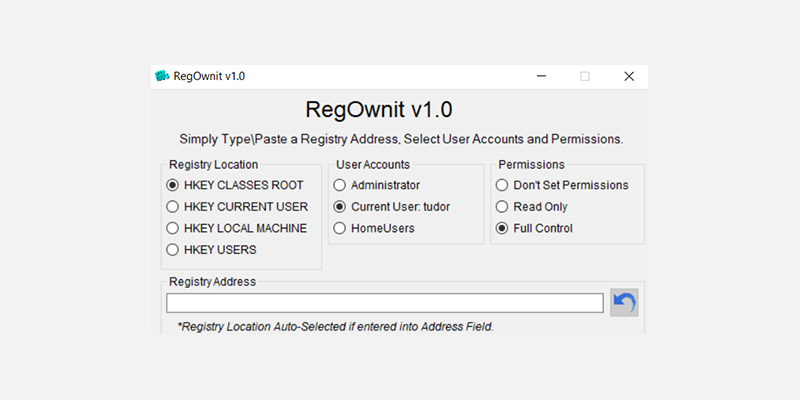
When you're done, press Apply and you're done. Of course, the app is a much simpler way to get full ownership, but you'll need to install a third-party tool first. If you don't like installing programs that you don't regularly use on your PC, the previous method could be the smart way to go.
With Control Comes Responsibility
You now have the power to modify the registry as you choose. However, it's best not to play around with the registry unless you're sure of what you're doing. In some cases, you could land your system in trouble.
This is why it's good to always create a backup of your registry. In case you run into trouble, you can use the backup to revert your registry to its previous working state. However, if things don't work out well, you might need a professional's help, but you can also fix a lot of Windows Registry errors yourself.