Adobe Photoshop and other image editing tools bring image manipulation to the masses. Practically anyone can take a photo and edit it in ways that may be hard to detect. Fashion magazines, social media influencers, and even politicians are often guilty of manipulating photos.
With so many potentially manipulated images floating about on the net, how can you tell if a picture has been manipulated or not? In fact, there are several ways to detect a fake. Here are some of the most common and effective methods.
1. Check the Edges
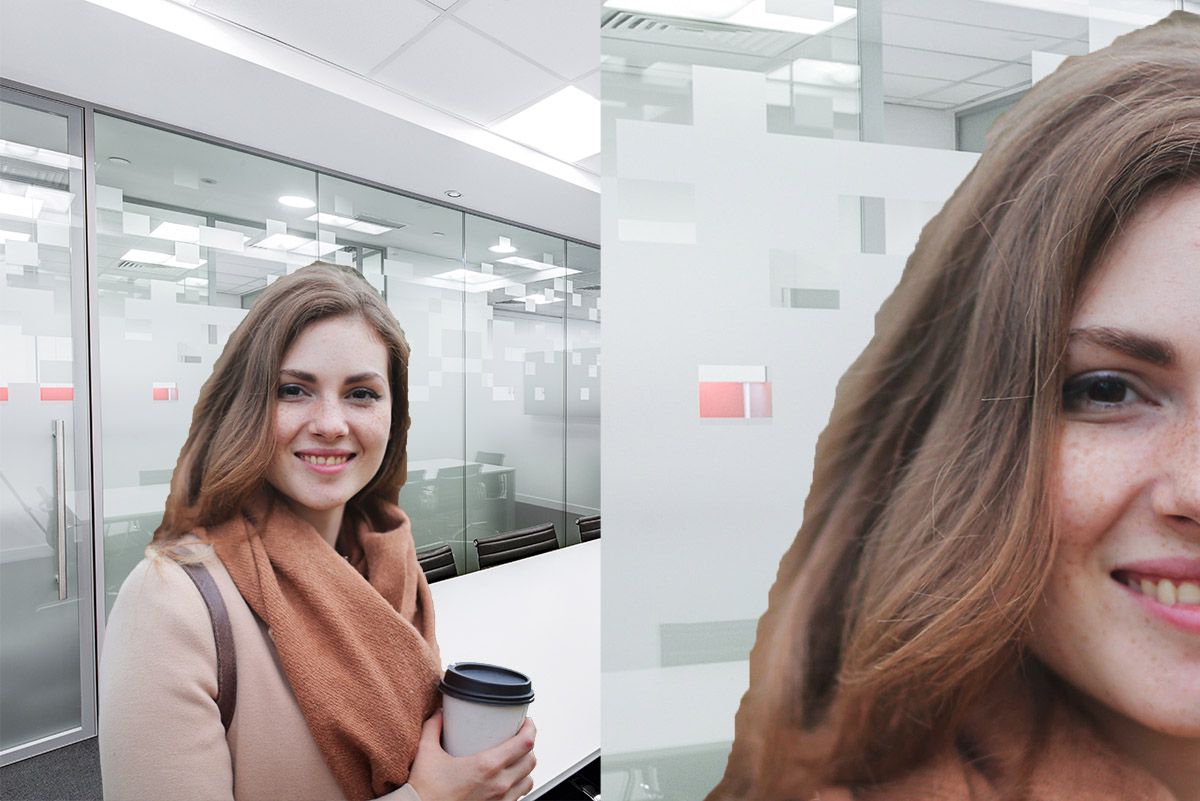
When something has been superimposed into a scene, you can sometimes tell by looking at the edges. If Photoshop’s Quick Select or Magic Wand tool has been used, it often leaves jagged edges around the subject.
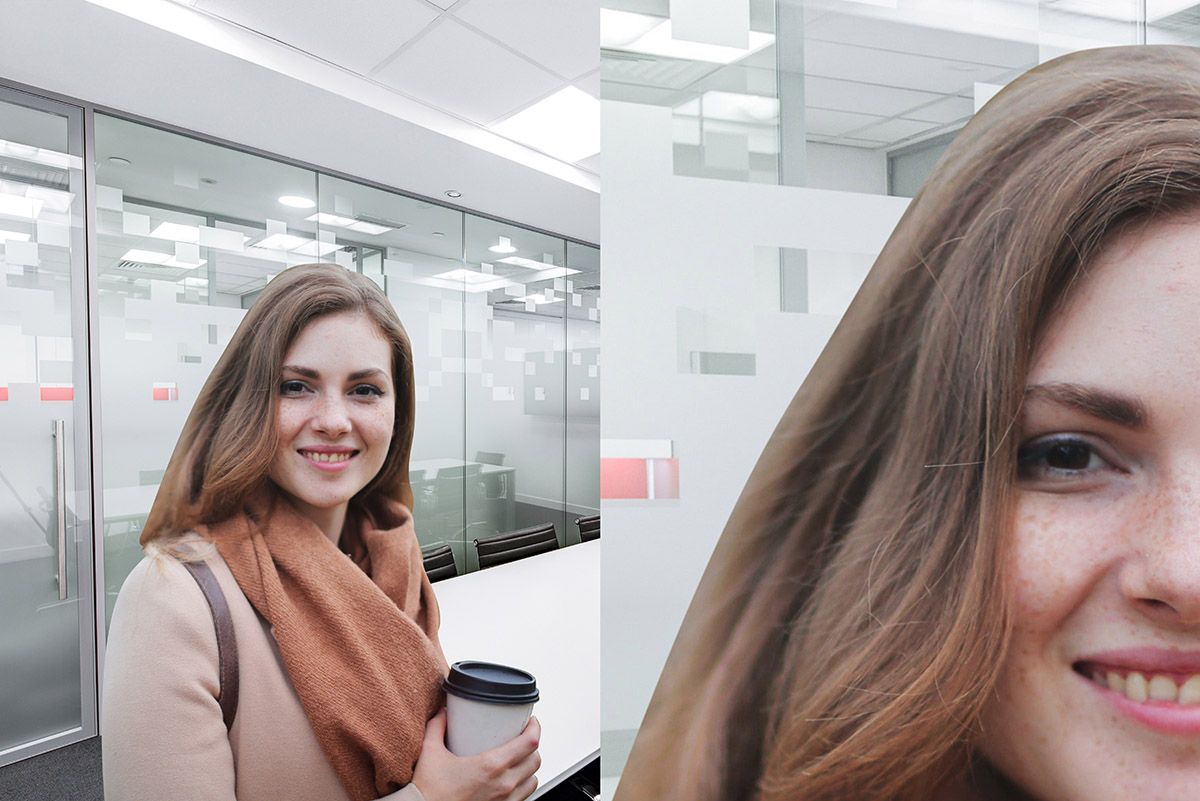
Alternatively, you might notice that the edges are too smooth. This often happens when people cut around complex objects, like hair or fur.
They can’t cut out all the individual strands around the edges, so they use something like Photoshop’s Pen tool to make an exact selection. This results in unnaturally smooth edges.
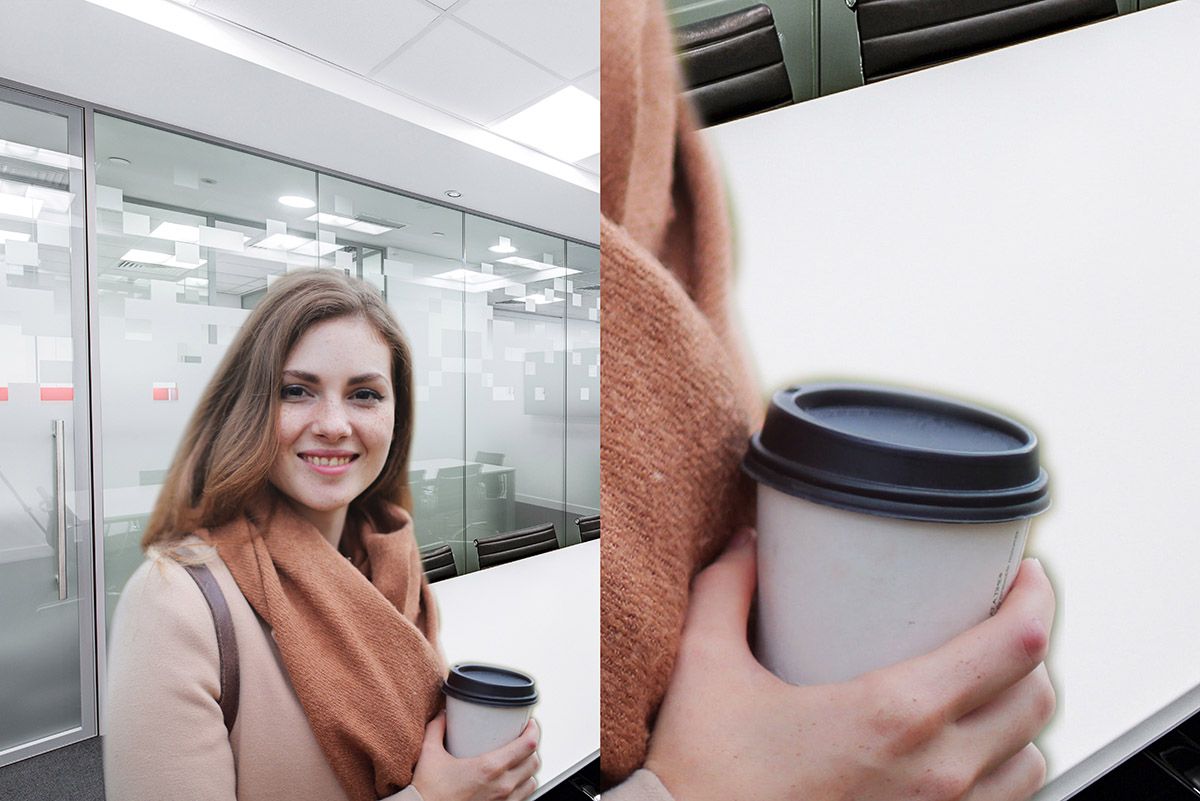
To get around the problem of smooth edges, people can use feathering, which essentially softens the edges of a selection. Done right, this can make a superimposed object look more natural in its new setting—turn it up too high, and it can look obviously blurred.
2. Look for Reversed Text
It’s a rookie mistake, but sometimes people flip images without thinking about any text that might be in their picture.

Flipped text in an entire image doesn’t prove anything, but if you see text written the correct way in one part of the image and reversed in another, it’s clearly been manipulated.
3. Examine Any Shadows
Mistakes in shadows often reveal when an image has been manipulated. A classic error is using a drop shadow where it shouldn’t be used.
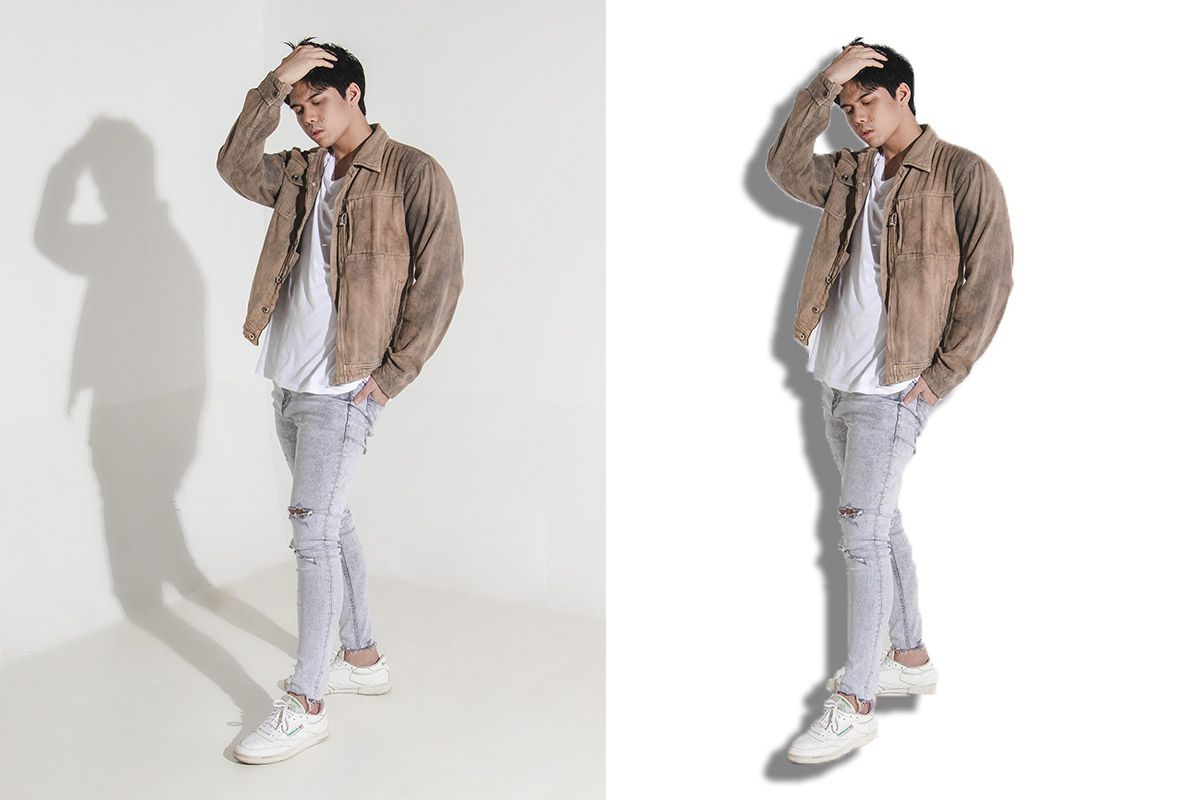
The image above shows a real shadow, cast long across the floor, and then shorter up the wall. A basic Photoshop drop shadow, however, looks flat and very clearly fake.
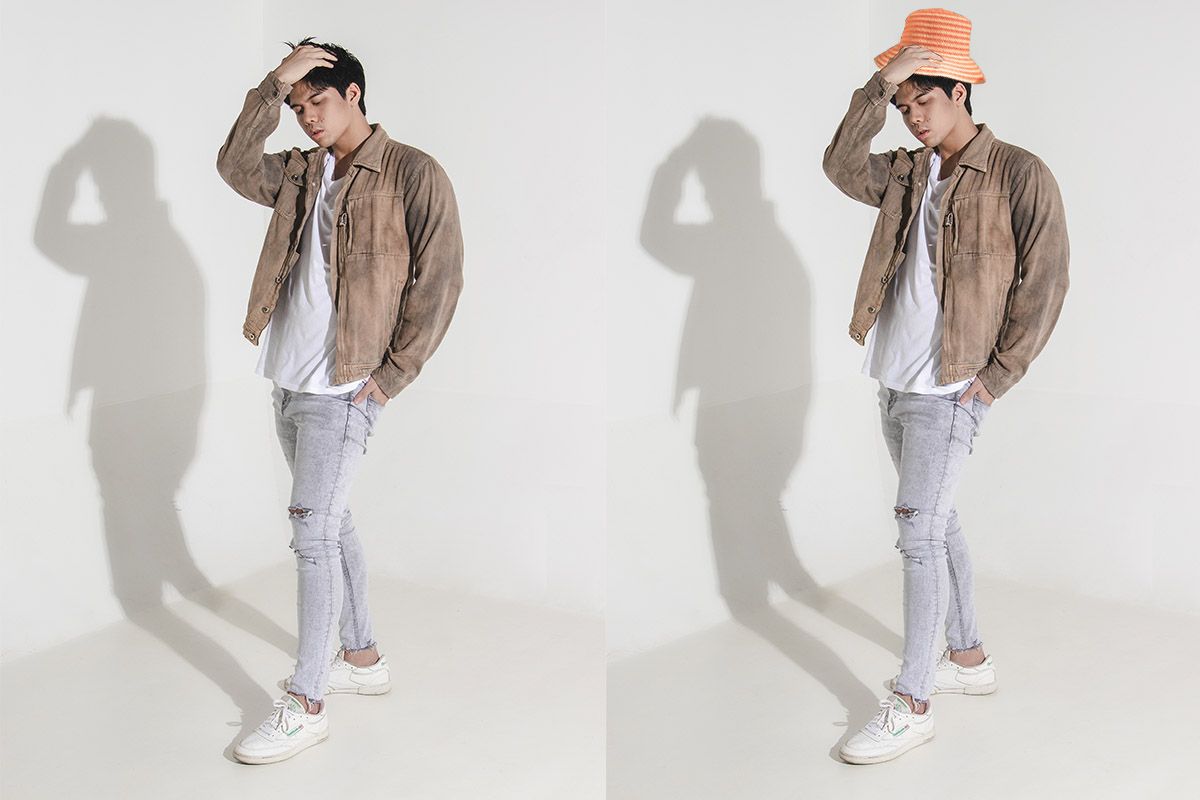
Missing shadows is another big giveaway. An object gets added to a photo, but the shadow has been removed or is cast in a way that looks unnatural. Such mistakes won’t always be as obvious as our example, but they do happen.
When multiple elements have been inserted into a photo, you might also notice that they don’t all cast shadows consistently.
4. Missing Reflections
Look for shiny objects and mirrors in any image you think may have been edited. Oftentimes, whoever manipulated the photo will have forgotten to account for any reflections that should be showing.
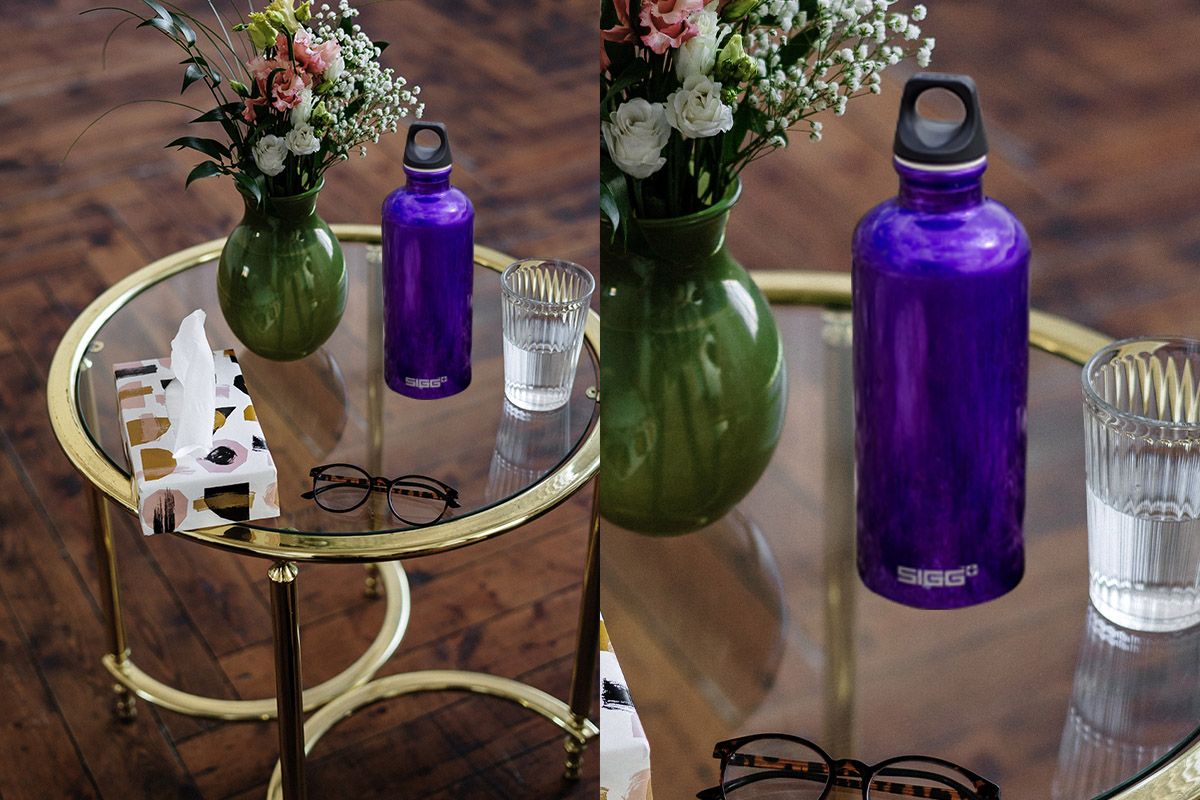
In this example, all the objects are reflected on the glass table, apart from the metal bottle we’ve added. The bottle should also be reflected in the vase, and the bottle itself should show some reflections from the other objects on the table as well.
5. Bad Perspective
If an object photographed from a low angle is inserted into an image taken from a higher angle, it will look wrong because it often depicts something impossible.

The example here is obviously wrong, as you shouldn’t be able to see the underside of the subject’s table and the tops of the others. Of course, many edited images will be done better than this, so any errors in perspective are likely to be more subtle. Either way, the principle is still the same.
The next time you come across a potentially manipulated photo, ask yourself: should I really be able to see this surface if I’m able to see that one? If the answer is no, it’s probably been manipulated.
6. Look for Remnants of Deleted Objects
People sometimes want to remove someone from a photo. Occasionally, though, they leave something behind that gives the game away—a body part, perhaps, or a reflection.
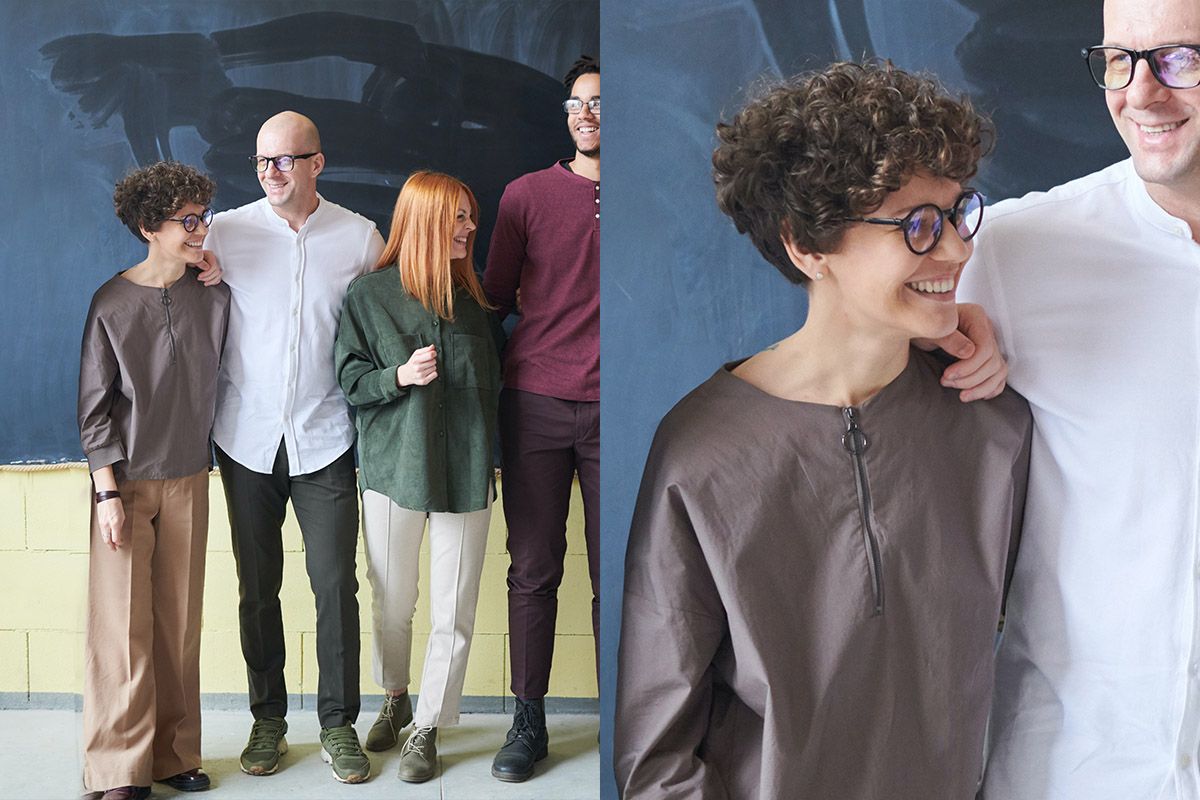
We’ve created our own example of that here, but this is something that has actually happened many times in magazines and newspapers. In case you haven’t noticed, this woman has a floating hand on her shoulder, which belonged to someone who used to be standing next to her.
You should also look out for shadows that seem to be cast by nothing. Chances are, whatever was making those shadows has been removed from the photo.
7. Look for Signs of Cloning
Image editors like Photoshop make it easy to copy one part of a photo into another part. This is called cloning, and it enables people to do things like make a crowd look bigger, or to fill a blank space after cutting something out.
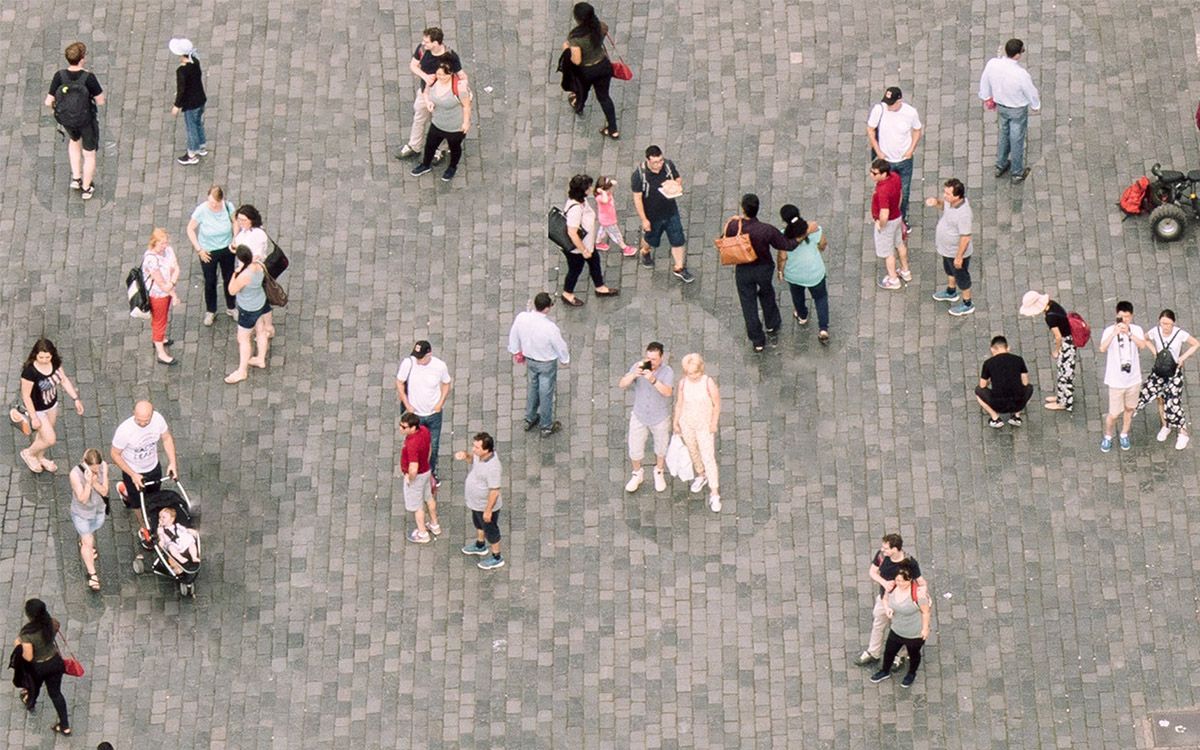
In this image, you can see some of the telltale signs of cloning. For starters, some of the people appear in the photo twice. There are also people in the picture who haven’t been pasted in fully. And the cloned areas of brickwork don’t line up with the real ones.
8. Try Zooming In
Some Photoshop errors only reveal themselves when you zoom in. What looks real at normal viewing size may clearly appear fake when viewed close up.

In this photo, the flowers have been extended to the right edge. It doesn’t look amazing, but at a glance, you might not notice anything unusual.
Zoom in, and it’s much more obvious that the flowers have been cloned from various parts of the original image. It’s only at this larger size that you can clearly see that some of the flowers have been partially cloned in.
9. Identify Any Warping
A skilled Photoshop user will know how to avoid warping, but people who don’t know what they’re doing can easily make this mistake.
They want to make something in their image bigger or smaller, so they use something like Photoshop’s Liquify tool. And while they do manage to alter the thing they want to, they inadvertently edit something else too.
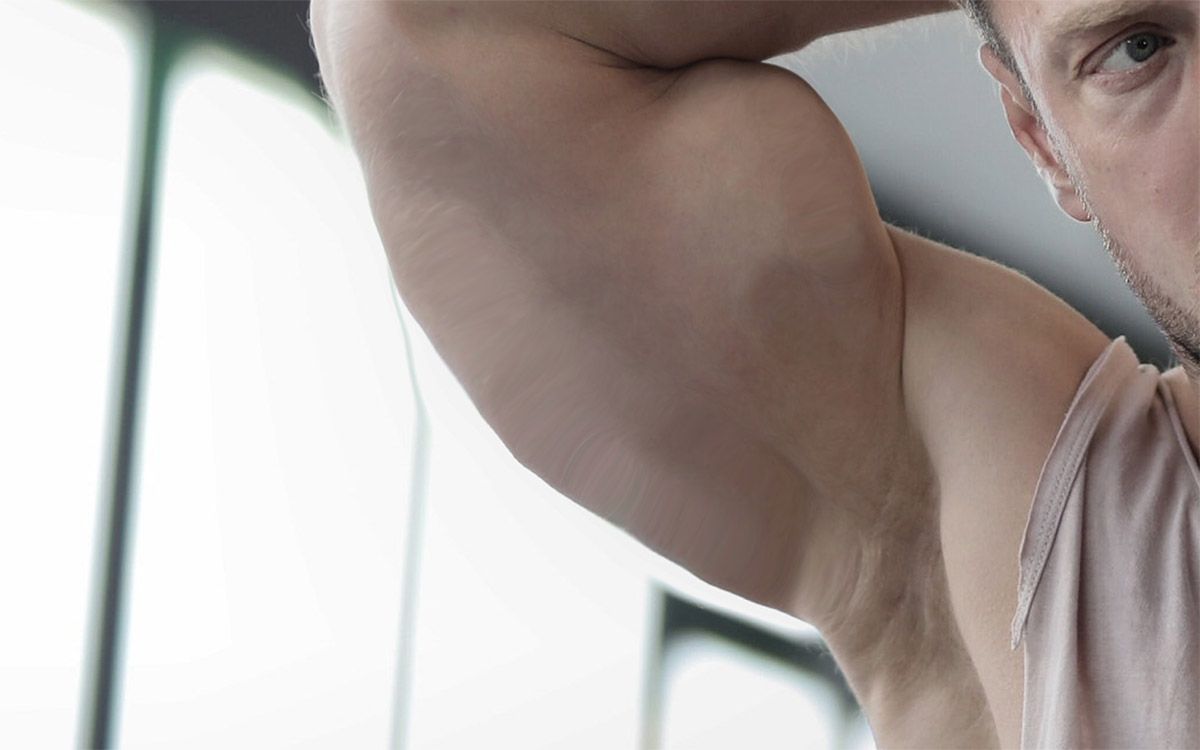
Commonly, the background around the edited object or person will be warped, like the example above. The upper arm of this person has been made to look bigger, but the window behind him is distorted.
10. Look for Inconsistent Lighting
Unless there are clearly multiple light sources in a photo, the lighting should generally come from a consistent direction. If a group of people or objects are close to each other but have light and dark areas on different sides of them, the photo is probably manipulated.

Aside from any other problems with this picture, the man in the corner has a shadow on the right side of his nose. That suggests the light source is on the left. However, he’s standing next to four people who have shadows on their left, meaning the light is coming primarily from the right.
11. Reverse Image Searches and Specialist Tools
You can use something like Google Images or TinEye to upload an image and search the web for it. There are even tools that search specifically for faces.
As well as finding exact matches, reverse image search sites will find similar photos. There’s a good chance that if an image has been manipulated, these reverse image search sites will find the original picture.
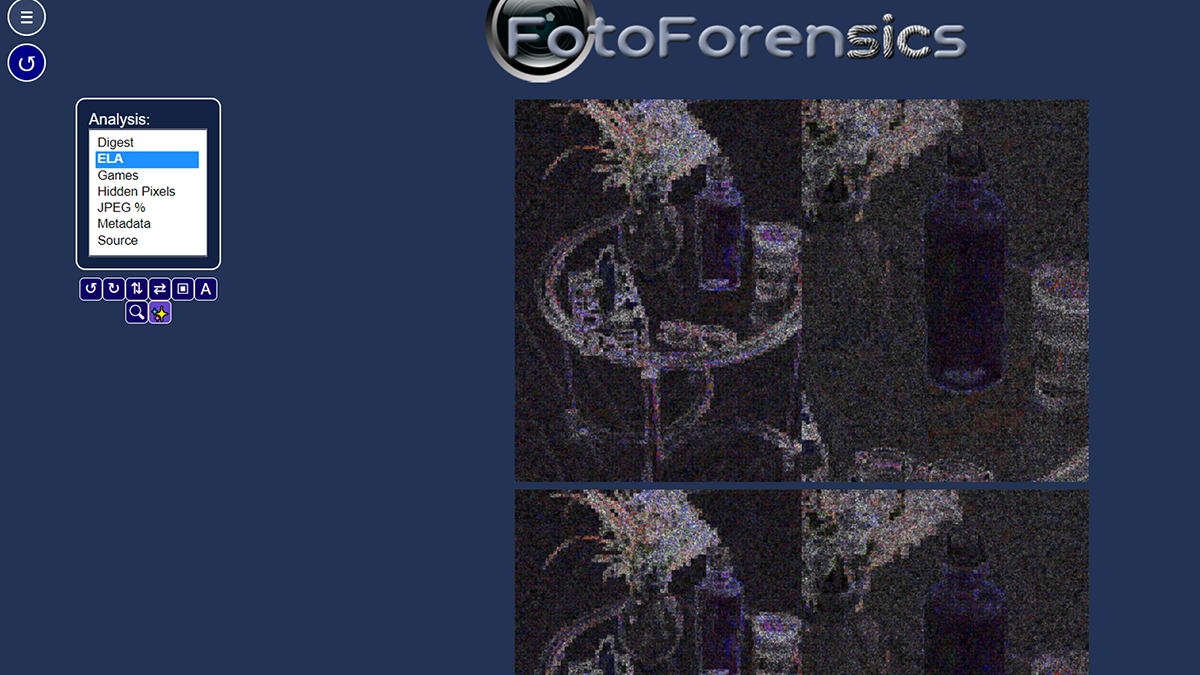
There are also various online tools specifically designed to help you find out whether an image has been manipulated or not. One of the most well-known is FotoForensics, which enables you to see things like hidden pixels and view the EXIF data of photos.
EXIF data is metadata, which stores a variety of information about the origin of a photo. As well as viewing it, you can edit or delete EXIF data.
Do Your Images Look Fake?
Are you guilty of creating unconvincing Photoshop images? In most cases, you want your edited images to look as realistic as possible.
You don’t want a simple visual inspection to show they’re fake. If you’re unsure about the best ways to superimpose things into your images, it’s best to brush up on your Photoshop skills before showing off your edits.


