Creativity is about mixing two or more elements into something wonderful. Learning to combine photos using Photoshop is a basic skill. The steeper learning curve really starts after that when you have to create eye-catching effects from the simple mix of images.
Adobe Photoshop is a powerful piece of software, so there are many ways to edit photos using Photoshop. Let’s start with the easiest methods to bring two photos into the canvas and combine them into a new photo in under five minutes.
The three methods are:
- Create a composite layout.
- Blend one photo with another.
- Combine a specific part of a photo.
1. Drag and Combine Photos Into a Composite Layout
You must have seen those fancy magazine page layouts with images arranged beautifully. It is the easiest method to combine photos in Photoshop.
- Launch Photoshop. Start with a new image. Choose File > New.
- Go through the document types like Web or Print on the dialog box. You can use the Width and Height measurements of your base photo. Set the Background to Transparent from the dropdown. Click OK.
![New document in Photoshop]()
- Bring the first photo from your computer into the document and then position it as you like.
- Press Ctrl + T for the Free Transform handles. Click and drag the handles around the edges to resize the image if it does not fit the document. Press Enter to commit the transform or click the checkmark on the toolbar.
- Add your other image to the document with a drag and drop. Each image is on its own layer. If the layer panel is not visible, go to Window > Layers.
- Drag and drop the layers with the Layer Panel to move images on top or below each other. Use the Move tool (Shortcut: V Key) to reposition the images as you want.
![Photoshop simple combination of two photos]()
- Now, finetune your design so that it looks exactly right. To resize the images and make their edges touch each other (without distorting them too much), you can always use the Ctrl +T (Windows) or Command + T (Mac OS) for the Free Transform handles.
Your final layout will depend on the number of images you want to combine. Try different ways to order them until you are happy with the look. You can also frame your composite better by adding beautiful borders to your photos.
2. Combine Photos With Blend Modes
Blend modes change the way one layer interacts with the layer below it. This gives you many options to combine two photos into creative composites.
There are several ways to use them creatively, but here’s a simple walkthrough for adding elements of one photo to another.
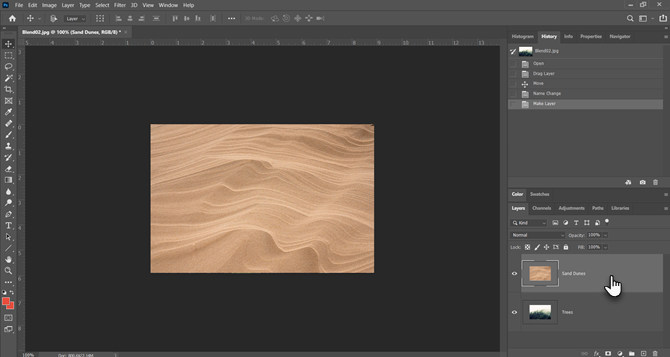
- Start with two photos each in its own layer. The main image should be the bottom layer. The image (the sand dunes) you want to combine should be on top.
![Photoshop Combining Images With Blend Modes]()
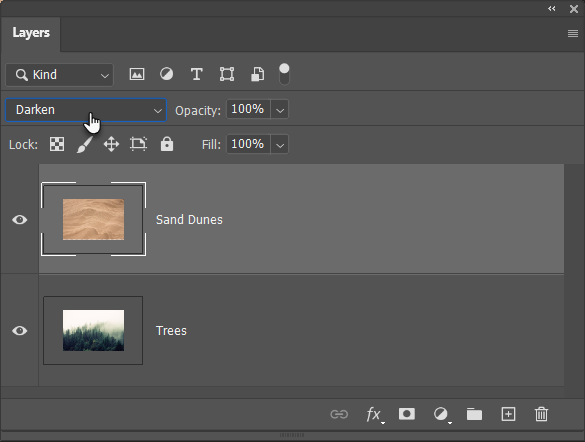
- In the Layers panel, select the top layer. Use the dropdown to the top left of the Layers panel to change the blend mode.
- The default blend mode is Normal which means that the two layers are not blending. Once you change the blend mode, the colors in the top layer will interact with the colors on the layer below.
![Changingblend modes in Photoshop]()
The final image uses the Darken mode here. The part of the top image (the sand dunes) which is darker than the bottom layer is now visible. The part which is lighter than the trees does not appear. The Lighten blend mode does the reverse.

Cycle through the other blend modes to find the one that looks best with your images. Multiply, Screen, and Overlay are three common blend modes. You can also use the Opacity slider to finetune the texture on the image.
Tip: Want to cycle through the blend modes quickly? First, press the letter V to select the Move tool. Then, press and hold the Shift key and use the plus (+) and minus (–) keys to go up or down the list. It’s a quicker way to visually compare the blend modes.
It can be a little daunting for beginners. So, learn more about blending modes and keep experimenting to grasp how it works visually.
3. Combine Any Part of a Photo With a Layer Mask
A layer mask helps you combine two photos when you want to merge part of one photo into another photo.
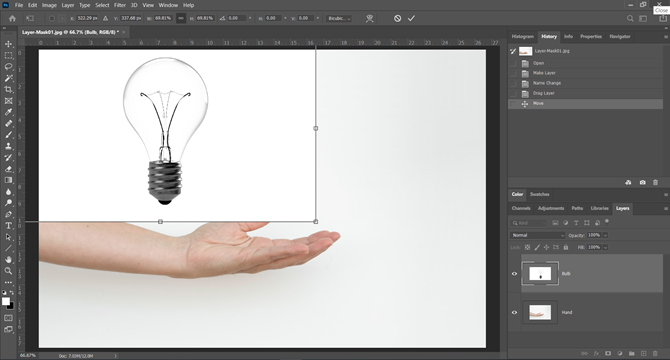
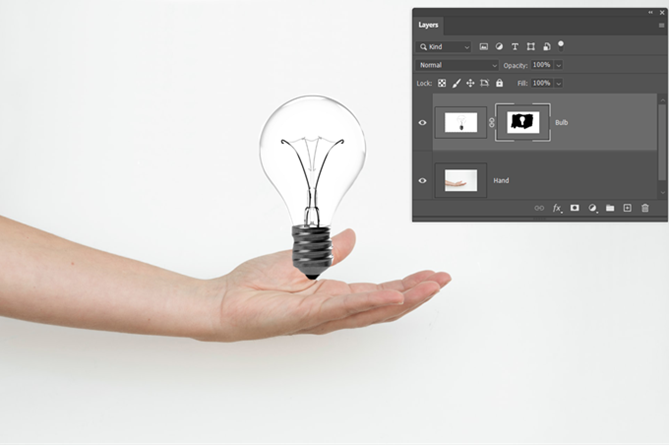
- Bring the two images you want to combine into Photoshop and place them as two layers. The main image (the hand) should be at the bottom and the image you want to merge (the bulb) should be on top.
![Layer mask example with two images]()
You can also bring the second image from File > Place Embedded to add it as a Smart Object (how to use Smart Objects in Photoshop). But let’s keep it simple for this tutorial. - Go to the Layers panel and select the top layer.
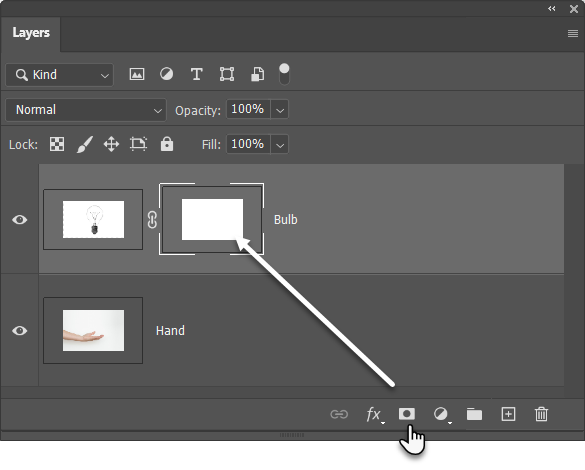
- Click the Add layer mask icon (the rectangle with the black circle). The layer mask links to the top layer and appears as a white thumbnail next to it. The white part of the mask reveals everything below it on the linked layer. The black part hides everything else. You have to use these black and white properties to hide and combine parts of the top layer with the layer below it.
![Select Layer mask in Layers panel]()
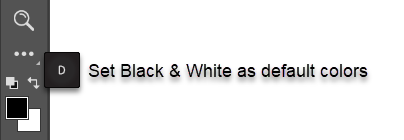
- Select the Brush tool from the Tools panels. Hit D on the keyboard to set default colors as Black and White in the Tools panel. On Windows, press the Alt + Right Mouse key and then drag left or right to decrease or increase brush size. Drag up or down to decrease or increase brush hardness.
![Press D for default colors in Photoshop]()
- Click on the Mask thumbnail to keep it selected. Choose black as the brush paint color and start painting on the mask on the image to make areas you want to hide. In this case, we are hiding everything except the bulb. You can reverse the color to white and touch up the areas you want to keep hidden.
- Press Ctrl + T for Free Transform. Use the corner handles to resize the image of the bulb proportionate to the hand.
![Photoshop layer masked image of hand and bulb]()
The layer mask controls the transparency or the amount of light it will let through. Unlike the Opacity slider which applies to the entire image, the layer mask is more selective with the black and white interplay as we see above.
This is a simple illustration of layer masks as there are better ways to select and mask a subject in Photoshop.
Stitch Photos Into Wide Panoramas
If you are into landscape photography, then panoramas are the best way to grab more visual real estate. If you are not packing a DSLR or a wide angle lens, don’t despair, as you can do a lot with a simple lens too.
Just take multiple photos and combine them with Photoshop’s Photomerge feature. Of course, Photomerge isn’t the only tool that can stitch them for you. So why not try these free tools to create a panorama from multiple photos.
Read the full article: 3 Ways to Combine Photos Using Photoshop


