Performing a right-click action on a Mac has always been slightly more mysterious than doing the same on Windows. Historically, the right-click functionality on a Mac was never as central to basic workflows as on its rival OS.
Even today, some users remain in the dark about how to right-click on a Mac. Keep reading and we will introduce you to the best solutions.
1. Use a Traditional Physical Mouse
The easiest way to right-click on a Mac (and indeed, any other operating system) is to buy a standard two-button physical mouse. You can pick up basic entry-level mice online for less than $ 10.
Plug the mouse into your Mac (you’ll need an adapter if your Mac only has USB-C ports), and the operating should automatically recognize the new hardware. Give it a couple of seconds, and the mouse will start to work. From there, right-click as you normally would.
2. How to Right-Click on a Mac Trackpad

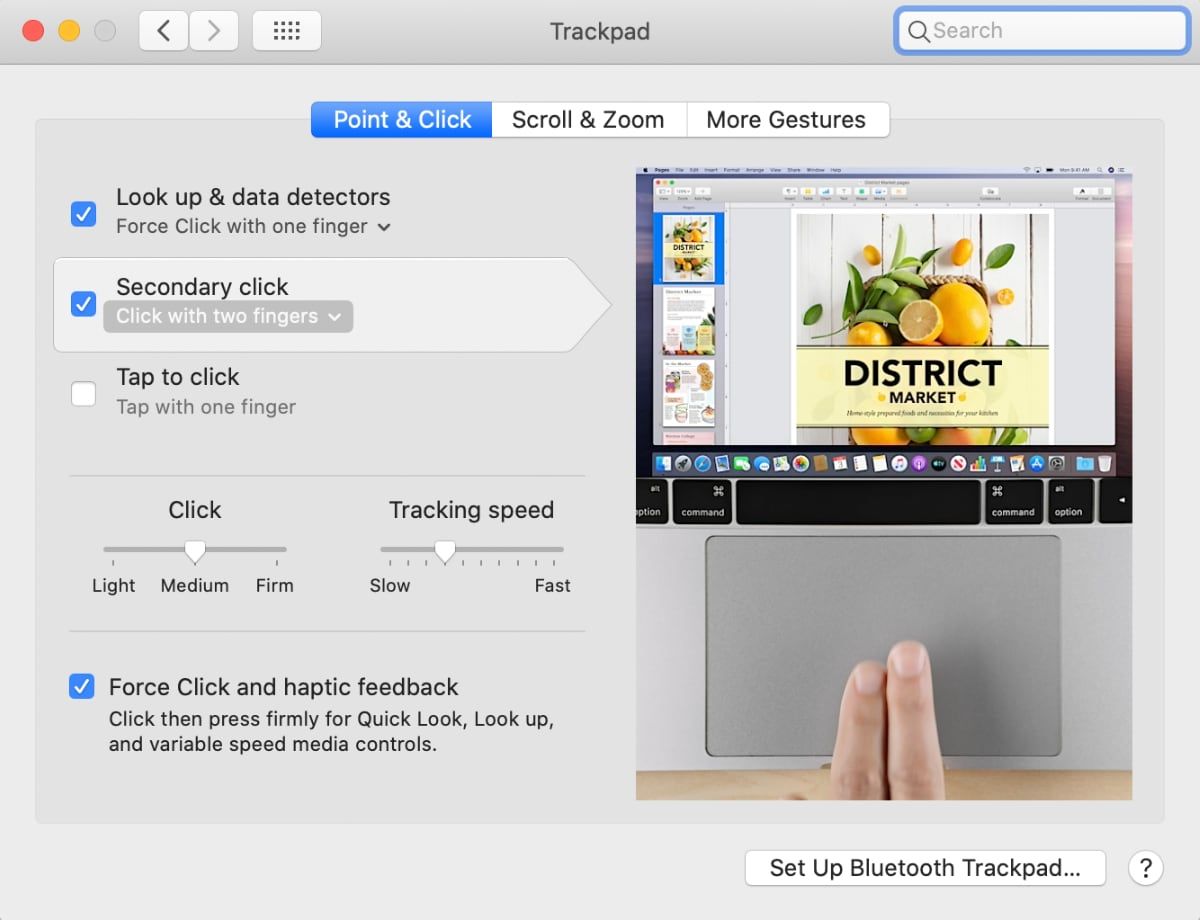
Unlike trackpads on various Windows machines, right-click functionality uses the same gesture on every Mac’s trackpad. Theoretically, right-clicking on a Mac’s trackpad is as simple as clicking or tapping with two fingers. But it doesn’t always work as planned.
Maybe you’re having issues with your trackpad, or perhaps you’ve accidentally disabled the setting and can’t figure out how to turn it on again. Either way, don’t panic! It’s easy to enable the right-click functionality on a Mac trackpad, then tweak the settings to your liking:
- Click on the Apple icon in the Menu Bar.
- Select System Preferences.
- Choose Trackpad.
- Click on the tab labeled Point and Click.
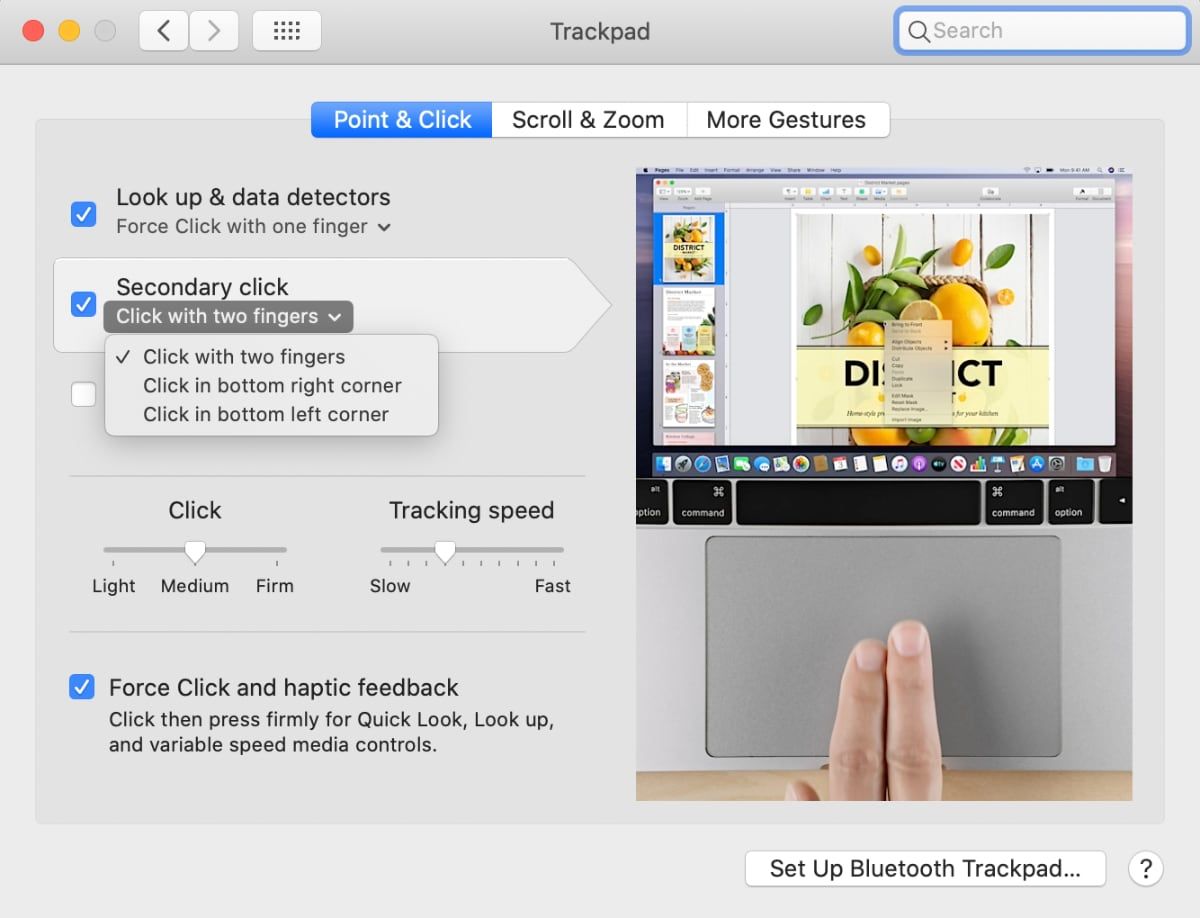
- Mark the checkbox next to Secondary Click.
This will ensure the feature works again. If you don’t have any luck, try restarting your machine after making the changes.
How to Change the Right-Click Action on a Mac

By default, you need to right-click on a Mac’s trackpad using a two-finger tap. However, some people might prefer to set up their right-click functionality in a different way. Luckily, macOS lets you easily change the right-click action to something else.
The two options available are both fairly self-explanatory. Follow the instructions below to get started:
- Click on the Apple icon in the Menu Bar.
- Select System Preferences.
- Choose Trackpad.
- Click on the tab labeled Point and Click.
- Expand the drop-down menu below Secondary Click.
- Choose either Click or tap with two fingers, Click in bottom right corner, or Click in bottom left corner.
Close the app and perform some tests to make sure the settings were updated correctly.
3. How to Right-Click on an Apple Magic Mouse
An Apple Magic Mouse differs from a regular mouse thanks to its lack of physical buttons.
Because of the lack of buttons, it is not always immediately obvious how to right-click. However, in practice, the Magic Mouse uses many of the same gestures as the regular trackpad.
That means that simply clicking the right-hand side of the mouse will be enough to activate a right-click.
If it does not work, you can go to System Preferences > Mouse > Secondary Click and choose the desired option.
4. Use the Keyboard to Right-Click on Mac
The last right-click method is also the least commonly used: the keyboard. The keyboard is great to get you out of a bind if you’re using someone else’s computer and their Magic Mouse doesn’t have its secondary click activated.
To use the keyboard to right-click, just hold down the CTRL button while you perform a regular left-click. The operating system will register the action as a right-click.
Learn More Mac Tips and Tricks
Having complete control over right-clicking on a Mac is an essential part of using the operating system effectively.
If you’re a Mac newcomer, you should next learn some Safari tips and tricks for mastering the default browser.

