
Asana is one of the best productivity tools that you can use for free, and it’s perfect for a creative professional looking to manage their schedule. It comes with a lot of customization options, but when you’re first learning the ropes its versatility might seem intimidating.
Let’s ease into it. Here’s how to create and keep track of a project using Asana.
Step 1: Log In and Get Familiar
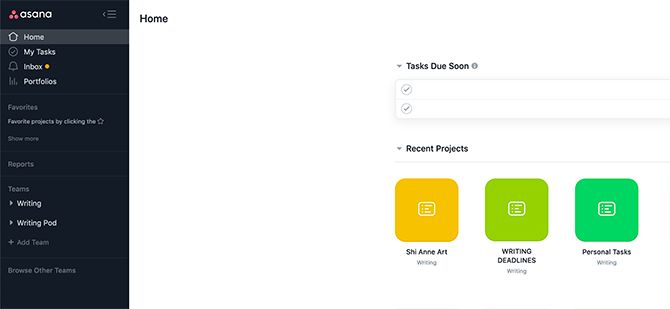
Asana is web-based, so when you’re setting up your project you’ll need to log into your account. If you haven’t signed up yet, try the Basic free account first and see if you like it. For more advanced uses, Asana has different price tiers.
If you have tried to manage a project with Trello, we’ve already talked about how Asana compares to Trello as a project management tool.
Once you’re signed up, you’ll see a homepage similar to the screenshot above. Along the left side is your sidebar. In the center under Tasks Due Soon you’ll see a list of things you need to complete. Beneath that, you’ll see the icons for your recently opened projects.
Step 2: Create a New Project
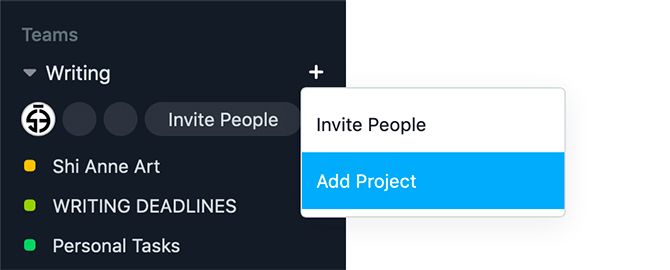
To create a new project, go to your sidebar. Under Teams, click + > Add Project.
Once you do, you’ll be greeted with a new screen that gives you a list of templates to choose from. Let’s go with Blank Project. For keeping track of day-to-day tasks you won’t need more than that.
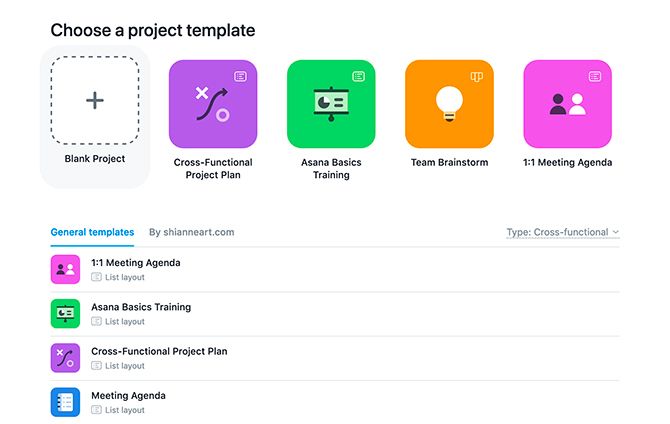
After you click on Blank Project, you’ll be prompted to add your details. This is where you’ll set up the “rules” that govern what your project looks like.
Because this project helps me with my day-to-day tasks, I’m going to set the privacy to Private to me. There’s no need for anyone else to see it.
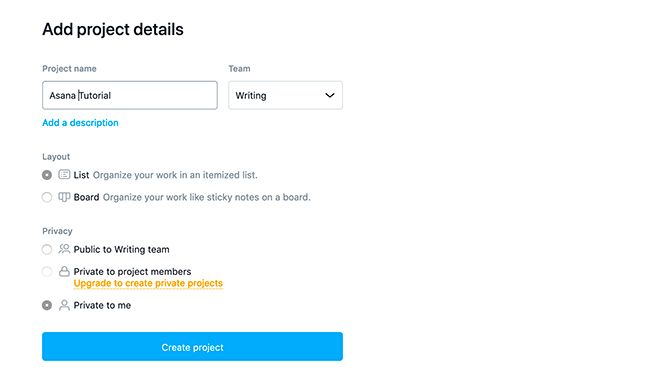
Next, click Create project. Asana will generate this project under your Teams category in the sidebar.
Step 3: Change Your Project Color
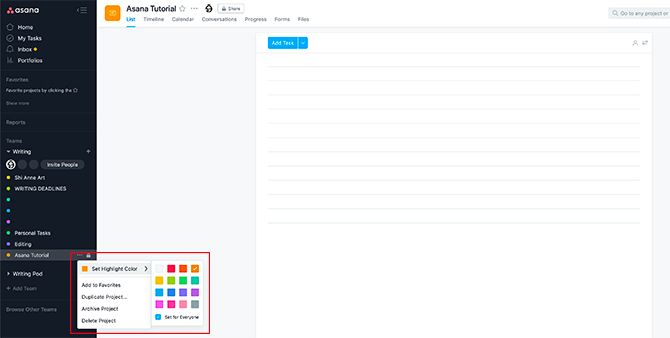
Now that you’ve created your new project, you can customize the color of it. This makes it easier to see in your calendar.
To customize your color, click on the “…” beside your project’s name. Under Set Highlight Color, choose a swatch.
Step 4: Create a Repeating Task

The beauty of Asana is that you can create multiple tasks with different parameters inside of each project.
Any task can also be a repeating one. To create a repeating task, click on your project’s name—“Asana Tutorial”—under the Teams section in the sidebar. This ensures the project is active.
Under List, click Add Task. This will automatically add a task card on the right-hand side of your workspace. This is where you will fill in your details.
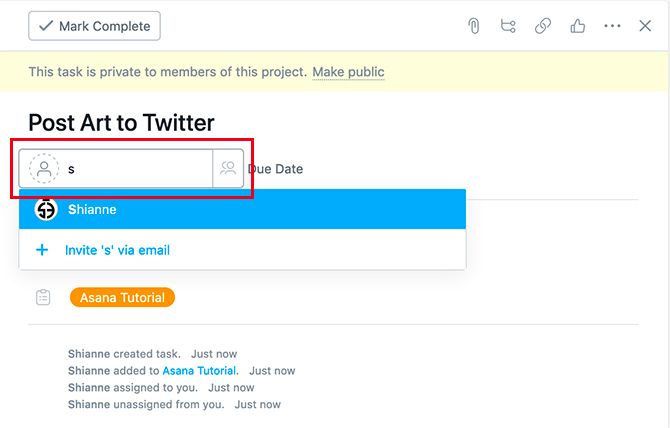
For this tutorial, I’m going to say this task is for posting art to Twitter.
To assign the task to someone, click on the person icon next to the Due Date. Type in their name. By clicking on their username the task is assigned to them.
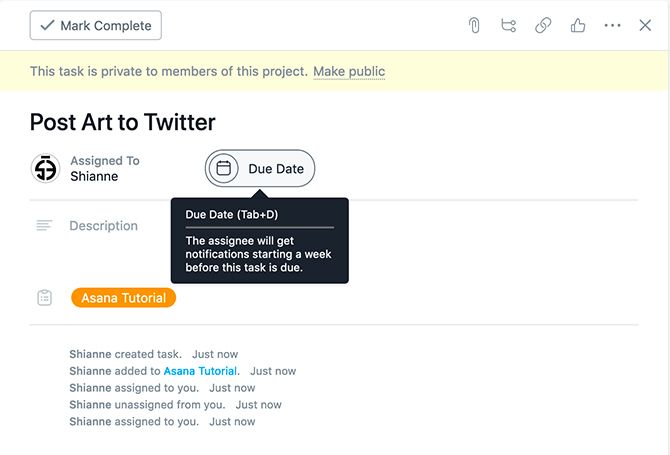
Next, let’s give this task a deadline. To do that click on the Due Date icon. This brings up the calendar and a list of dates you can choose from.
For this task, I’m going to set the deadline to March 24. But I also want to make this task repeat once a day once I have finished creating it.
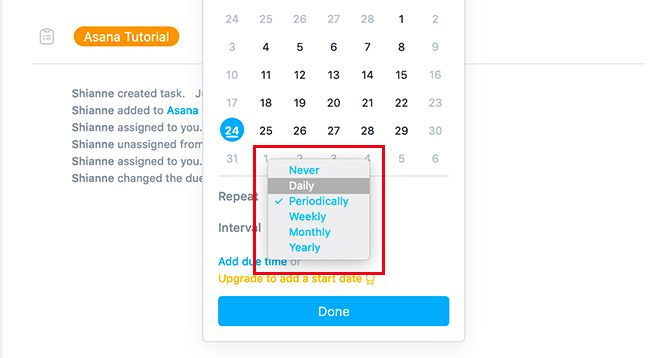
To turn on repeat, click Set to repeat. This will make a dropdown menu pop up, where you can choose daily, periodical, weekly, monthly, or yearly intervals.
You can also click Add due time to have the task due at a certain time each day. For this tutorial, I’m going to type in 11:00am.

After you’re finished, click Done. You’ll see your new task pop up with its name, due date and who it’s assigned to in the List.
That said—what if you want to create a task for a more complicated project? What if this task has a hard end date, or there are multiple steps that you need to complete?
Step 5: Create a Task With Subtasks
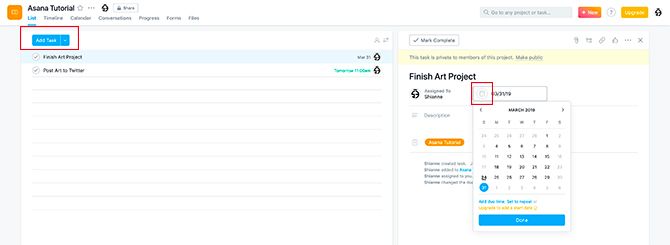
To create a task with a hard end date, follow the same process that we laid out in Step 4.
Click on Add Task, fill out the title, the assignee and due date, but when you get to Due Date don’t click Set to repeat. It’s not needed.
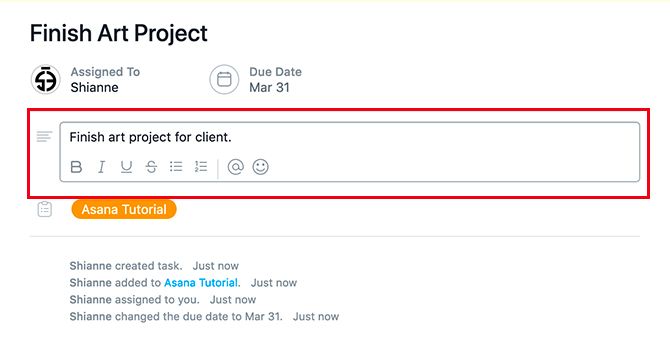
Under the title section, you’ll see a text box that says Description. By clicking on this box you can fill out the information on your project: who the client is, what they need, or any ideas you want to include in your design.
All these details side-by-side might get complicated. If your task requires multiple steps to finish, you can add subtasks to keep track of them.
To create a subtask, click on its icon at the top of your task card, seen here highlighted in red.
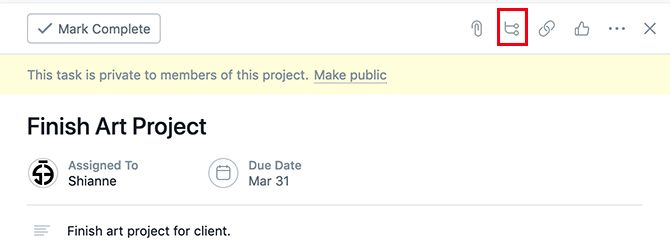
This will automatically create a subtask for you. Like the parent task, you can name it, give it a due date, or assign it to another person.
If the main task is set to private, the subtask will need to be assigned to you. To quickly assign the task, click on the person icon, then click Assign to Me.

Now that you’ve created one subtask, you can create additional subtasks within your task card.
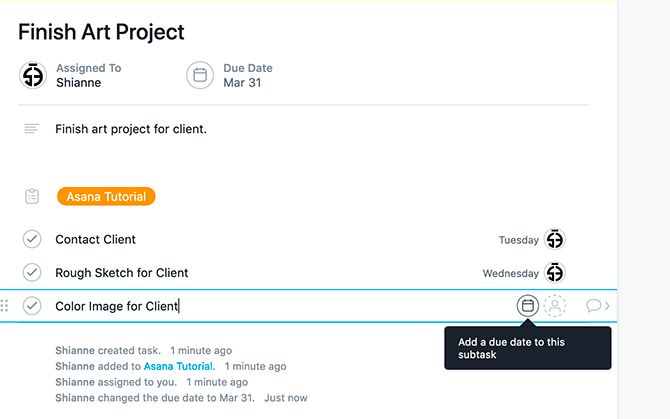
You can also re-arrange the subtasks by clicking and dragging them using the six dots located on the left side of each check mark. This is useful if you create your subtasks out of order.
Step 6: Adding Tags
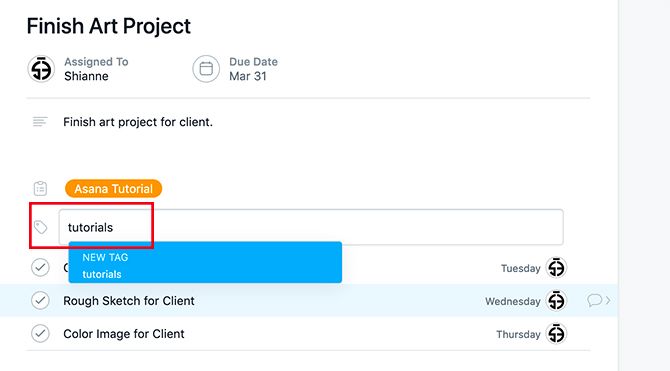
Once you’ve created your subtasks, you might want to tag this project so it’s easier for you to find. To tag it, press Tab + T to bring up your tag box. This box will appear above your subtasks.
I’m going to tag this project “tutorials”, but as you can see I don’t have a tag for that yet. To create one, click on the blue box that says NEW TAG. Asana will generate it for you.
Step 7: Completing a Task
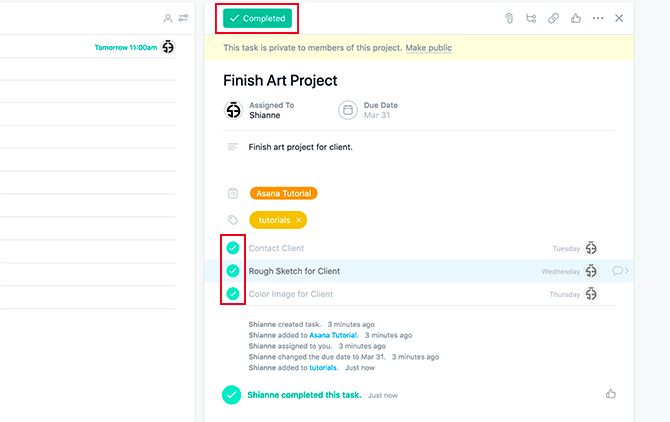
So now that we’ve finished setting up repeating and one-time tasks, there’s not much more to do other than “complete” them.
When you finish a task or subtask, click on the checkmarks next to the item. They will turn green once they’re done.
Step 8: Deleting a Task
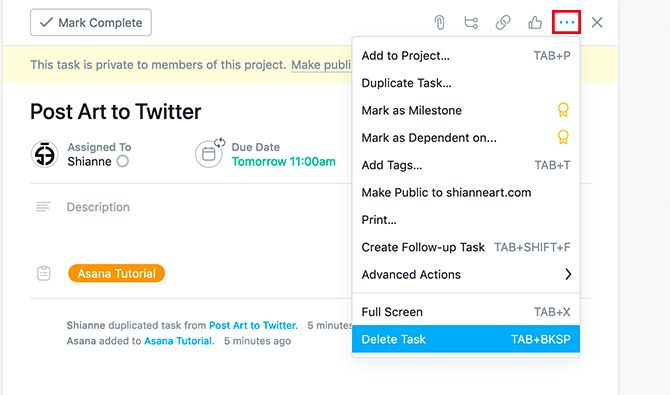
What if you want to delete a task that is no longer active? Click on the three dots in the top right-hand corner of your task and select Delete Task.

Once you do, Asana will prompt you: do you want to undo your last action, or get rid of the task for good? If you’re sure you don’t need the task again, click Delete Permanently and Asana will wipe it.
Use Asana to Organize Your Life
As you can see, Asana’s ability to manage your creative projects—and customize them—can be done with just a few simple steps.
It’s not the only tool that can help you with your time and projects, however, and if you’re looking for more info we’ve got a great list of free project management tools for you.
Read the full article: A Beginner’s Guide to Using Asana for Tracking Any Project


