If you want to put your Mac into recovery mode, boot from a USB stick, or start testing your hardware using Apple’s diagnostic tools, you’ll need to use the right startup key combinations.
These keyboard shortcuts let you interrupt your Mac’s normal boot process, and can even change the way macOS behaves when you log in. Most of the time, though, you’ll only need these key combos when troubleshooting your Mac.
Here’s a handy guide to macOS boot modes and startup keyboard shortcut combinations, and when you’d need to use them.
macOS Boot Modes and Key Combinations
In order to put your Mac into a specific boot mode using the shortcuts below, you must first press the power button then immediately press and hold the desired key combination.
On older Macs you can wait until you hear the boot sound before holding the shortcut, but new Macs no longer make any sound on startup.
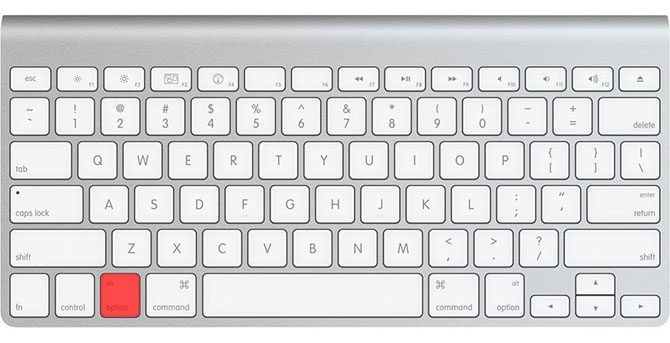
Startup Manager/Boot From USB: Option

Apple’s startup manager prevents your Mac from booting the default startup volume. Instead you’ll get a list of all connected volumes, including USB and external drives. This is particularly useful if you’re trying out a Linux distribution or installing Windows from a USB stick.
Safe Mode: Shift

If you’re having problems and your Mac won’t boot, Safe Mode (also known as safe boot) forces your computer to load only the bare essentials it needs to start the operating system. Your startup disk will check for errors and make repairs, and only use the required kernel extensions.
This mode will also prevent the startup and login items from opening when your Mac starts up. It disables custom user-installed fonts and clears a number of macOS system caches too.
Apple Hardware Test/Apple Diagnostics: D

Depending on the age of your Mac, it either comes with Apple Hardware Test or Apple Diagnostics. These are troubleshooting tools that will detect obvious problems with your hardware, so you can attempt to fix or decide it’s time to replace your machine.
While these tests look for hardware issues, they don’t offer a huge amount of information about the problem. This can make it hard to attempt a fix. If you’re feeling brave and want more information, you’ll need to use Apple Service Diagnostics instead.
Variation: You can also use Option + D to start the test from the internet. This is ideal if you have problems with your hard drive or recovery partition.
Reset PRAM/NVRAM: Cmd + Option + P + R

Parameter RAM, also known as nonvolatile RAM, holds information about your computer’s current configuration. This includes date and time, volume, desktop settings, and so on. Occasionally you’ll get issues relating to sound, mouse scrolling, or keyboard that requires a PRAM/NVRAM reset.
Shut down your Mac, power it up, then immediately hit the key combination above. Wait till your Mac reboots again, then let go of the combination. Read more about PRAM and how it affects your Mac.
Reset SMC: Shift + Control + Option

The System Management Controller (SMC) is a chip on Intel-based Macs that controls aspects like fan speeds, power management, and more. Most Apple computers use the combination of keys provided above, but some models require you remove batteries or remove the power cord instead.
Recovery Mode: Cmd + R

Recovery mode is your ticket to solving many macOS problems from a friendly environment. The recovery partition is a separate part of macOS and you can use it to repair disks using Disk Utility, access the Terminal, and restore your Mac by reinstalling macOS.
Variation: You can also hold Cmd + Option + R to start internet Recovery mode, which downloads the necessary tools from the internet first. This is ideal if your recovery partition has been wiped or damaged.
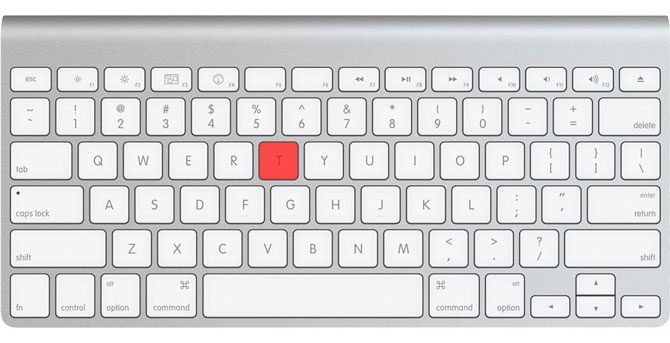
Target Disk Mode: T

If you want to transfer files from one Mac hard drive to another, Target Disk mode makes it simple. By starting a Mac in Target Disk mode, you can connect it to another Mac and copy files to and from the drives.
In essence, it turns your Mac into a hard drive enclosure. The only snag is that you’ll need to use the right cable for the job. Apple states you can use:
- Thunderbolt 3 (USB-C): iMac Pro/iMac 2017, MacBook Pro 2016, and later
- USB-C: MacBook 2015 and later
- Thunderbolt 2
- FireWire
You can’t use USB-A to USB-A cables, an Apple USB-C charging cable, or regular old Mini DisplayPort cables. Confused? Check out our full guide to USB-C, Thunderbolt 3, and Mac compatibility.
Single User Mode: Cmd + S

Single User mode boots your Mac into a minimal text-based environment with no GUI, and no drive volumes mounted on startup. You’ll only have access to a Unix prompt, into which you’ll need to type commands.
This mode allows you to fix problems with a Mac that refuses to start. You can attempt to repair the disk, copy files from one volume to another, or force optical media to eject—but you’ll need to know the right commands to do so.
Verbose Mode: Cmd + V

The clue here is in the name. Verbose mode replaces your Mac’s default startup graphics with a detailed status report of exactly what’s happening when your computer starts up. It doesn’t restrict anything from loading like Safe mode, nor does it boot into a command line environment like Single User mode.
Instead, Verbose mode is perfect for those instances when your Mac hangs on boot. You can see exactly what is interrupting the boot process, and hopefully take steps to remedy it.
For example, many boot problems are related to third-party kernel extensions. Verbose mode may highlight the problem extension, allowing you to reboot in Safe mode, remove the offending item, then boot as normal and try again.
Boot From Optical (CD/DVD) Media: C

Is your Mac old enough to have an optical drive? If so, you can create CD or DVD images for installing macOS, or other operating systems like Linux and Windows. Holding C while your computer boots forces macOS to ignore your startup volume in favor of bootable optical media instead.
Eject Optical Media: Eject, F12, or Mouse/Trackpad

Got a CD or DVD stuck in your Mac? Trying to boot from the wrong optical volume? Turn on your Mac and immediately press and hold Eject, F12, or your mouse/trackpad button until your computer spits out the disc.
Boot From NetBoot Service: N

NetBoot allows system admins to boot client computers from a network image, which isn’t something most home users will ever need to do. This allows companies to customize macOS to their liking and create custom images for specific users, then deploy it network-wide without modifying every machine.
Variation: You can also use Option + N to specify the default image, rather than a custom image designed for specific users or hardware.
macOS Login Key Combinations
The following combinations change the way login works on your Mac.
Disable Automatic Login: Left Shift

If you have set your Mac to login automatically, you can tell it to ignore this setting by holding Left Shift after the boot screen (a white Apple logo and progress bar) appears.
You’ll be taken to the regular login screen, where you can choose another user account or continue as Guest.
Prevent Login Items/Previous Windows: Shift

Want to stop all your login items and previous session windows from opening on launch? When you get to the login screen, enter your password as normal then click on the Log In button (or hit Enter). Immediately press and hold the Shift key while your Mac logs in and boots up.
This is perfect if you left some sensitive folders open that you’d like to hide from prying eyes, or to prevent any resource hogs from booting straight away.
Even More macOS Keyboard Shortcuts to Know
These startup key combinations will interrupt your Mac’s normal procedure in case of problems. You won’t need them unless you’re trying to fix your own Mac or toying with the idea of installing Linux. But it’s always good to know them for troubleshooting purposes.
Note that there are many more Mac keyboard shortcuts that may come in handy, and we recommend that you learn them now so you can rely on them when you really need them.
Read the full article: A Quick Guide to macOS Boot Modes and Startup Key Combinations


