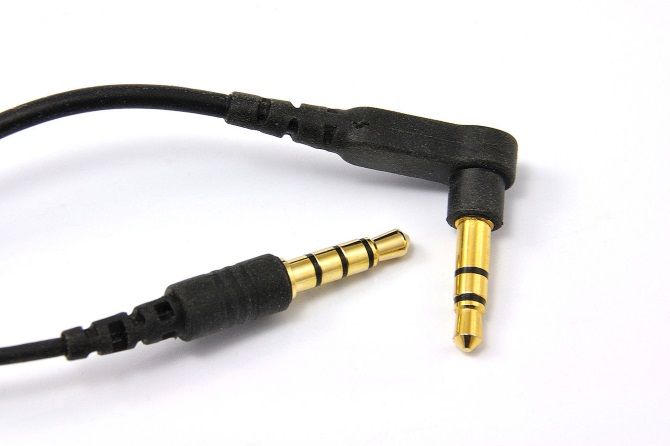
Holding a broken headphone jack, and wondering where the end is? Pulled the earphones too quickly from your tablet or smartphone, only to discover a bit was left behind?
Sadly, earphone jacks aren’t built for regular and repeated insertion and removal. If a piece of your earphone jack is stuck in your phone, tablet, or even MP3 player, you’ll need to remove it before you can use any replacement earphones.
These six methods should help you retrieve the lost part.
6 Ways to Remove a Broken Headphone Jack

All too often, the end of a broken headphone jack gets stuck in your phone or tablet. It turns out that these small cylinders of metal are weak where the (usually) black plastic rings appear along the length. This is the same for any wired earphones, whether they’re in your ears, on your ears, or over your head.
Removal is a problem, but fortunately, several solutions have been discovered to remove the debris:
- Inside of a Biro.
- Supergluing the rest of the jack.
- Thumbtack with a bent point
- A toothpick with hot glue.
- A heated paperclip.
- A dedicated tool called the GripStick.
When withdrawing the broken component, make sure you’re holding your device with the earphone socket pointing downwards. Gravity always helps!
Also, before looking at these methods in more detail, note that the following steps are performed entirely at your own risk. While less invasive than repairing headphone speakers, a wrong move could result in a broken phone or tablet entirely.
1. Use the Inside of a Biro
Here’s a fun fact: the tube running up the inside of your biro (such as a Bic or Paper Mate) is almost exactly the same diameter as an earphone jack. With a bit of force and adjustment, this can be used to remove the broken jack from your device.
To do this, remove the inner tube. This is the piece with the ink in it, and is almost always removed by pulling the nib of the pen. At the bottom of the tube, the opposite end to the nib, you should find there is no ink. You can use this portion of the tube to remove the broken jack. Simply push it firmly into your earphone socket, and remove. The tube should grip the jack, and pull it out.
If this doesn’t work first time, you have some options. The first is to slightly widen the tube with a nail, to ensure a snug fit for the jack. Alternatively, you could quickly heat the end of the tube to soften it, then push it into the socket. Leave it for a moment, then withdraw.
Also, if you have a very steady hand, try hot glue or superglue, in a very small quantity, on the end of the tube before insertion. The video above demonstrates a similar approach, using chewing gum.
Finally, you might be missing some pressure. If you can, cut a two inch length of the tube (or find something of a similar size, such as the tube from a can of lubricating oil), then insert into the earphone socket. Next, tap into place with something firm (like a shoe or slipper) just to ensure the lost jack part is gripped. When you’re happy it is held by the tube, remove from the phone.
2. Superglue the Other End of the Jack
If the pen cartridge doesn’t work, or you prefer a different approach, then the answer could be superglue. You probably know that when using superglue, you never bind two surfaces immediately after application. Instead, you wait, until they have dried slightly and become tacky. This tackiness is key to removing the broken piece of the jack in this scenario.
Using a cocktail stick or some other narrow applicator, place a tiny blob of superglue on the remaining end of the earphone jack. That’s the piece that didn’t break off in the phone! Wait (as per the packet instructions) for it to become tacky, then slide into the socket. After pushing down for 30 seconds or so, pull the jack out. If the broken component is attached, you’ve solved the problem.
While small amounts of glue should be used to avoid leaving residue within the socket, this can be removed. Simply apply a little rubbing alcohol to a Q-tip and swiftly clean inside the socket.
3. Thumbtack or Safety Pin
If you want a simpler approach, a thumbtack or drawing pin can be used. This requires that the point has a slight bend in it, so you might need to grab a hammer and apply a few swift blows. You should end up with a sort of “L” shape at the point of the thumbtack or safety pin.
With your device in one hand, take the thumbtack and push it into the earphone socket. Do this so that the point of the thumbtack touches the plastic part of the jack, then simultaneously push firmly and twist. The bent point should burrow slightly into the jack. When you’re confident you have enough purchase, pull the debris out of the phone.
4. Toothpick and Hot Glue
Looking for some other object that is small enough to fit into your phone’s earphone socket?
Try a toothpick; plastic or wooden, either is fine. Just make sure it is narrow and long enough to reach into the socket and connect with the lost chunk of your earphone jack. Then, tab a tiny amount of hot glue onto the end, and wait a moment for it to cool slightly.
Carefully insert into the earphone socket, and make contact with the debris. Wait for the glue to cool and dry, then remove. If all has gone according to plan, the missing piece will be removed!
5. Heated Paperclip
No glue to hand? Heat is a good substitute, as the broken part of the jack is almost always accompanied by ring of plastic. To grab hold of this, take a paperclip, and unwind it slightly, perhaps by bending the main length out by 90 degrees.
Next, hold the paperclip with something heatproof, and heat the end of the bent piece. With your phone in your other hand, insert the heated paper clip carefully into the socket, straight down the middle. Push firmly, and wait a few minutes for the plastic to cool. If all has gone well, you should soon be able to remove the broken piece of the earphone jack.
6. Buy a GripStick
If DIY fixes aren’t working for you, it might be time to consider the pro-level solution. GripStick is the result of a successful Kickstarter campaign, designed specifically for the task of removing broken off earphone jacks.
GripStick is available to buy online from the manufacturer’s website, nightek.com, for $ 24.95. Although pricey, it’s considerably less than paying a professional to remove the lost earphone jack. Similarly, if your phone is under warranty or smartphone insurance, it might be inconvenient to send it away for repairs (it usually is). Buying a GripStick will avoid this being an issue.
Use of the GripStick is simple. Slide the cylinder into the earphone socket, push it into place, and pull it out again using the ring. The lost piece will be held by the GripStick, and your earphone jack free to use once again!
Can’t Remove It? Test Your Volume
If for some reason you cannot get the broken earphone jack out of your device, don’t panic. It’s possible that your device volume still works, so find out. Play some audio; if the device speaker is still working, then you can consider another solution.
No audio? This is because the broken jack is telling your device that it is plugged in. As far as your phone or tablet is concerned, it is sending audio to your earphones. You’ll have a silent experience (frustrating for phone calls) until you can dislodge the offending object.
Maybe It’s Time to Switch to Bluetooth
It might be inconvenient, and it may require you to rethink your audio options, but switching to Bluetooth is the best way to avoid broken earphone jacks in the future.
Personally speaking, I’ve found that cheaper earphones are likely to have poorly made jacks. This has a dual risk: the jack may break, but it might also damage the socket. This can happen with standard use if the jack is cheaply manufactured, and the end result is frustration and disappointment.
While you might use one of the fixes above, buying Bluetooth earphones is the best option. Need help? Check our Bluetooth earphones buying guide.

