Windows keeps your list of your network adapters updated automatically. Whenever you install a new one, be that a new Bluetooth connection, new Wi-Fi dongle, or virtual network adapter, you'll find it listed under Network Connections.
From time to time, you may want to remove an old network adapter from the list, to keep it tidy and to help keep track of your active adapters.
So, read on to learn how to remove a network adapter from Windows 10 and Windows 11.
What Is a Network Adapter?
A network adapter is a piece of hardware that enables your computer to communicate with different devices. For example, on your laptop, you likely have a wireless network adapter to allow Wi-Fi connections and perhaps an Ethernet port to allow for Ethernet connections. You may also have a Bluetooth network adapter to allow for Bluetooth connections, and so on.
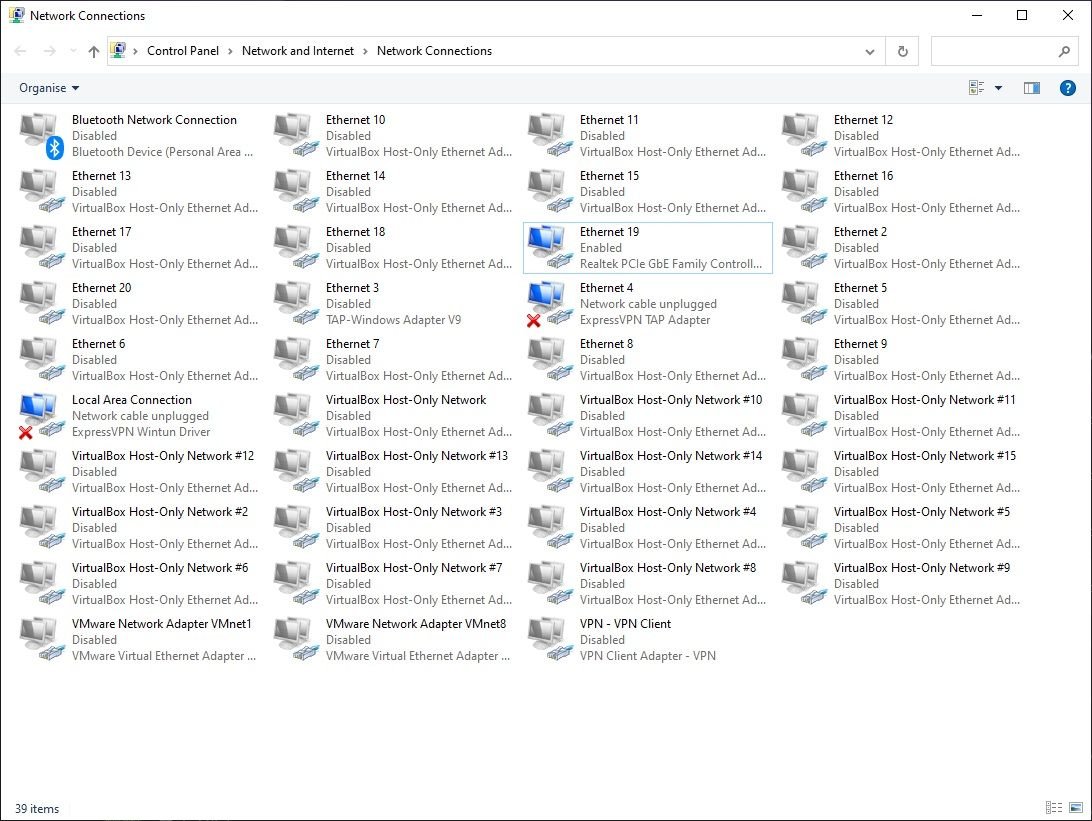
Network adapters make it easy for our devices to communicate, largely automating the process of configuring and managing active network connections between devices but also making it easier to troubleshoot when things go wrong.
Although not in this article, you may also see network adapters referred to as a Network Interface Card (NIC), but these typically refer to an expansion card plugged into a system, like a PCIe Wi-Fi card.
1. Remove the Network Adapter From Network Connections
The first way to remove a network adapter from Windows is through Network Connections. In this window, you'll find all of your network connections, and it's a handy way to manage your network adapters.
- Open File Explorer.
- Copy and paste Control PanelNetwork and InternetNetwork Connections into the File Explorer address bar and press Enter.
- Right-click the network adapter you want to remove and select Delete.
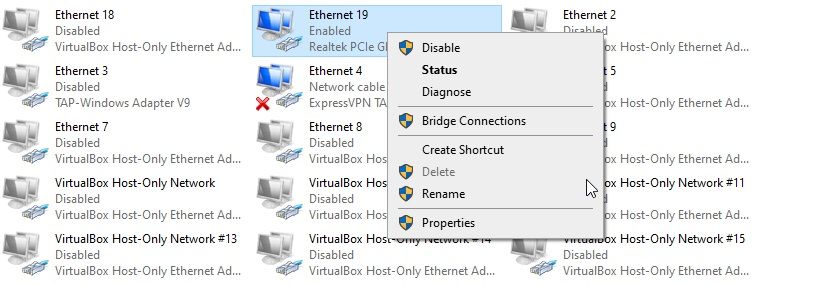
The network adapter will uninstall, and you've removed it from your system. However, as you may have spotted in the screenshot, the Delete button isn't always accessible. If you find the network adapter Delete button greyed out, move to the next section.
2. Remove the Network Adapter Using the Device Manager
Next up, you can attempt to remove the network adapter using the Device Manager. The Device Manager is a Windows utility that allows you to see all of the devices connected to your machine, be that a mouse, keyboard, graphics card, or network adapter.
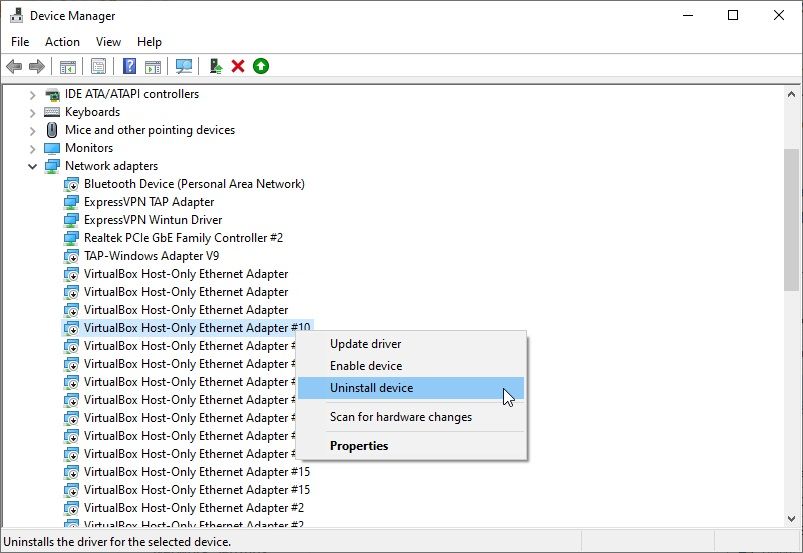
Input Device Manager in your Start menu search bar and select the Best match.
- Scroll down and unfurl Network adapters using the arrow icon.
- Right-click the network adapter you want to remove and select Uninstall device.
- When the warning appears, select Uninstall.
- Repeat as necessary.
3. Remove the Network Profile Using the Command Prompt
If the network adapter still refuses to budge, you can take another step and remove the network adapter profile from your system using the Command Prompt.
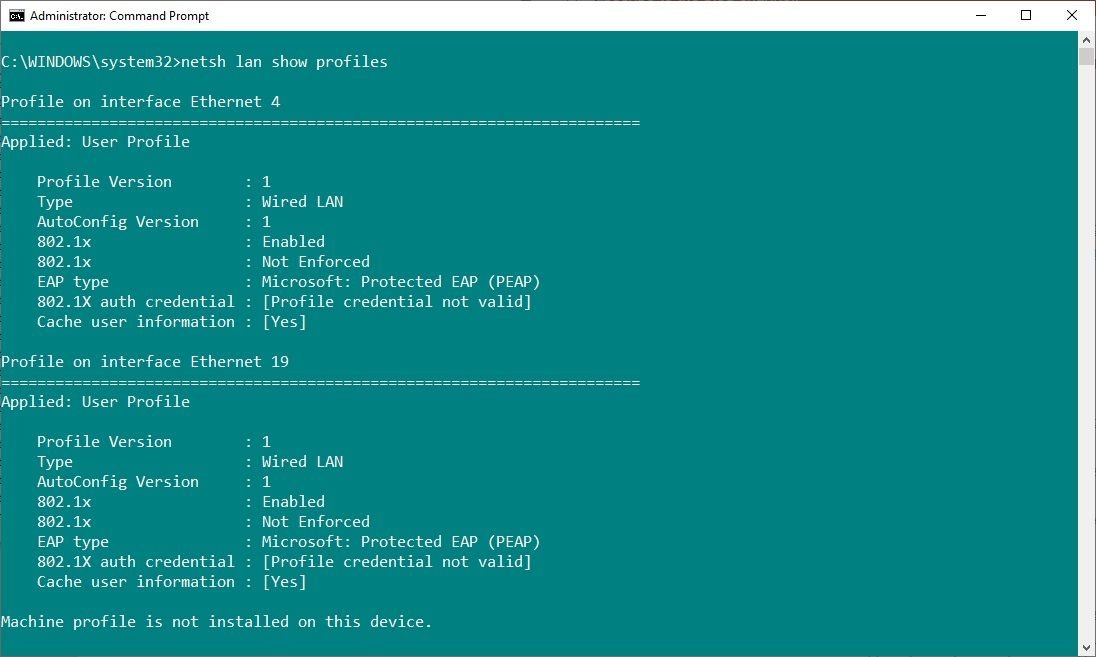
Input cmd in your Start menu search bar, then select Run as Administrator.
- Now, if you're trying to remove an Ethernet (wired) connection, input: netsh lan show profiles
- But, if you're trying to remove a Wi-Fi (wireless) connection, input: netsh wlan show profiles
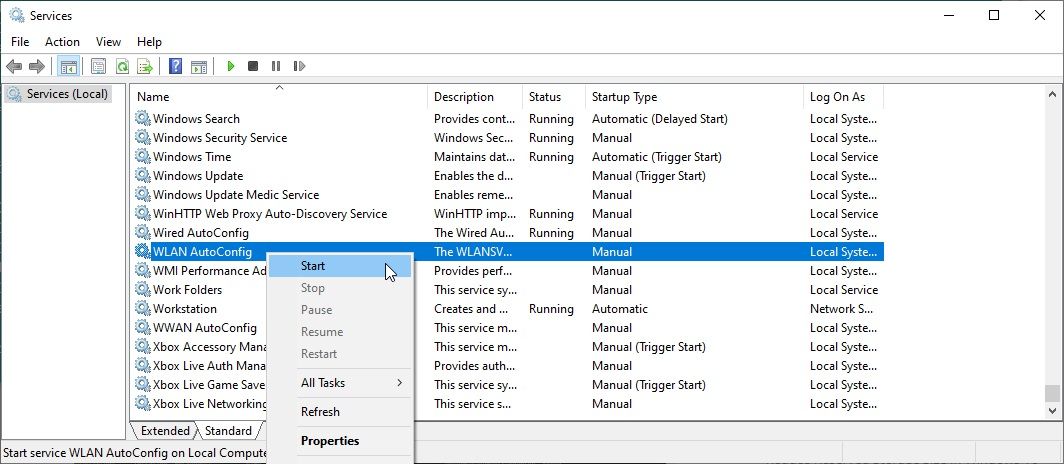
- Received the warning that the Wired or Wireless Autoconfig Service isn't working? In your Start menu search bar, type services and select the Best match, then scroll down and find Wired AutoConfig or WLAN Autoconfig, right-click and select Start.
- If you received the warning message, you should now enter the previous commands from step two or three.
- Find the network adapter you want to remove from the list and make a note of the interface name found at the top of each profile.
- Next, input the following command to remove a wired network adapter interface: netsh lan delete profile interface="InterfaceName"
- Or, input the following command to remove a wireless network adapter interface: netsh wlan delete profile interface="InterfaceName"
Now that you've removed the network adapter profile from Windows, you should find that you can remove the network adapter from the Network Connections window or the Device Manager.
4. Remove Network Adapter Settings Using the Windows Registry
Another option is to remove the network adapter settings using the Windows Registry. But, first, you need to check the details of the adapter you want to remove.
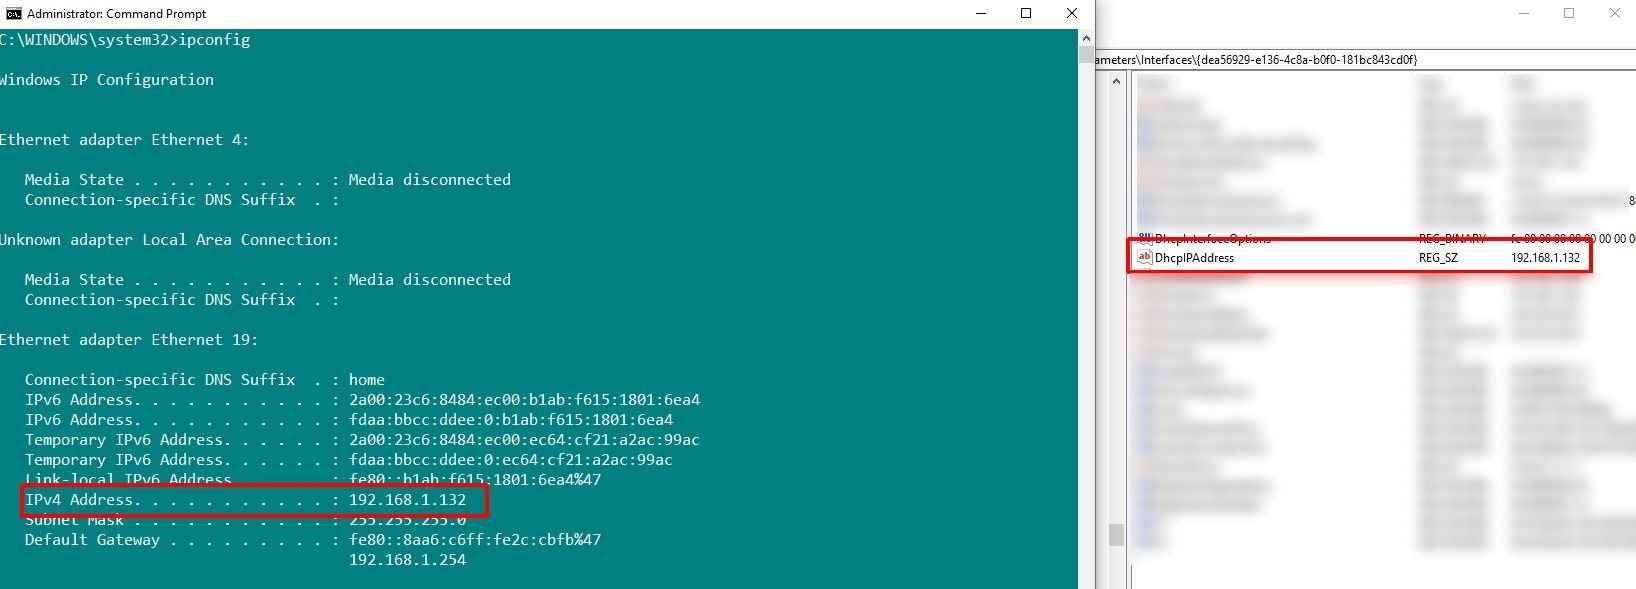
- Open the Command Prompt and input ipconfig. Find the network adapter you want to remove, make a note of the IPv4 Address and keep the Command Prompt window open.
- Now, input regedit in your Start menu search bar and select the Best match.
- Head to HKEY_LOCAL_MACHINESYSTEMCurrentControlSetServicesTcpipParametersInterfaces.
- Browse the list of interfaces, comparing the interface DhcpIPAddress to the IPv4 address in the Command Prompt. When you find a match, you've found the corresponding network adapter.
- Right-click the network adapter interface name (the long alphanumeric string) in the Windows Registry and select Delete.
Like the Command Prompt fix, this doesn't entirely remove the network adapter from your system. You'll still have to finish removing the network adapter via the Network Connections window or the Device Manager.
Related: How to Fix a Faulty Ethernet Connection in Windows 10
Is It Worth Removing Old Network Adapters?
You don't strictly have to remove old network adapters. In some cases, Windows will do the job for you if you upgrade or change your hardware configuration, but this is also what can lead to a list of old network adapters lurking on your system.
Furthermore, you might want to remove virtual network adapters for old virtual machines you no longer use if the host software hasn't automatically cleaned up. In my case, virtual machine software created over 20 different virtual network adapters, filling the entire window with different options.
Cleaning up your network adapter list should only take a minute of your time and can make it easier to figure out which connection has an issue when the time arises. If there are only one or two different options in the Network Connections window, you'll know exactly which connection has an issue.


