

Even in this day and age where almost everything is online and virtual, it still can't be helped that you will get some physical documents. And the best way to preserve these documents is to scan them and save them on your hard drive, cloud storage, or NAS.
To do so, you need a multifunction or all-in-one printer. However, these devices can be confusing to set up and use. They often require different apps and drivers, even if you're using other models from the same maker.
Luckily, both Windows and Mac allow you to do it easily. Here's how.
Scanning on Windows
If you're a Windows user, your computer will automatically detect your device once it's plugged in via the USB port. Whether your printer is a wireless or network device, Windows will automatically detect it, provided it's connected to your network or to the computer's Bluetooth connection.
However, if your computer doesn't detect it, you will have to set the machine up manually.
Manually Adding a Printer

Before starting this procedure, you must ensure the following: your printer has power, is turned on, and is connected to your computer. If you have a network or wireless printer, you should also check if it's connected to the same network that your computer uses.
Once you've double-checked the above, try to restart your printer and see if your computer will detect it now. If it still doesn't, then let's proceed with adding your printer manually.
First, click on the Start button, then go to Settings. In the Settings window, go to Devices > Printers & scanners. Under the Add printers & scanners section, select the Add a printer or scanner button. Wait for the computer as it tries to find nearby devices, both connected directly to your computer or via the network.
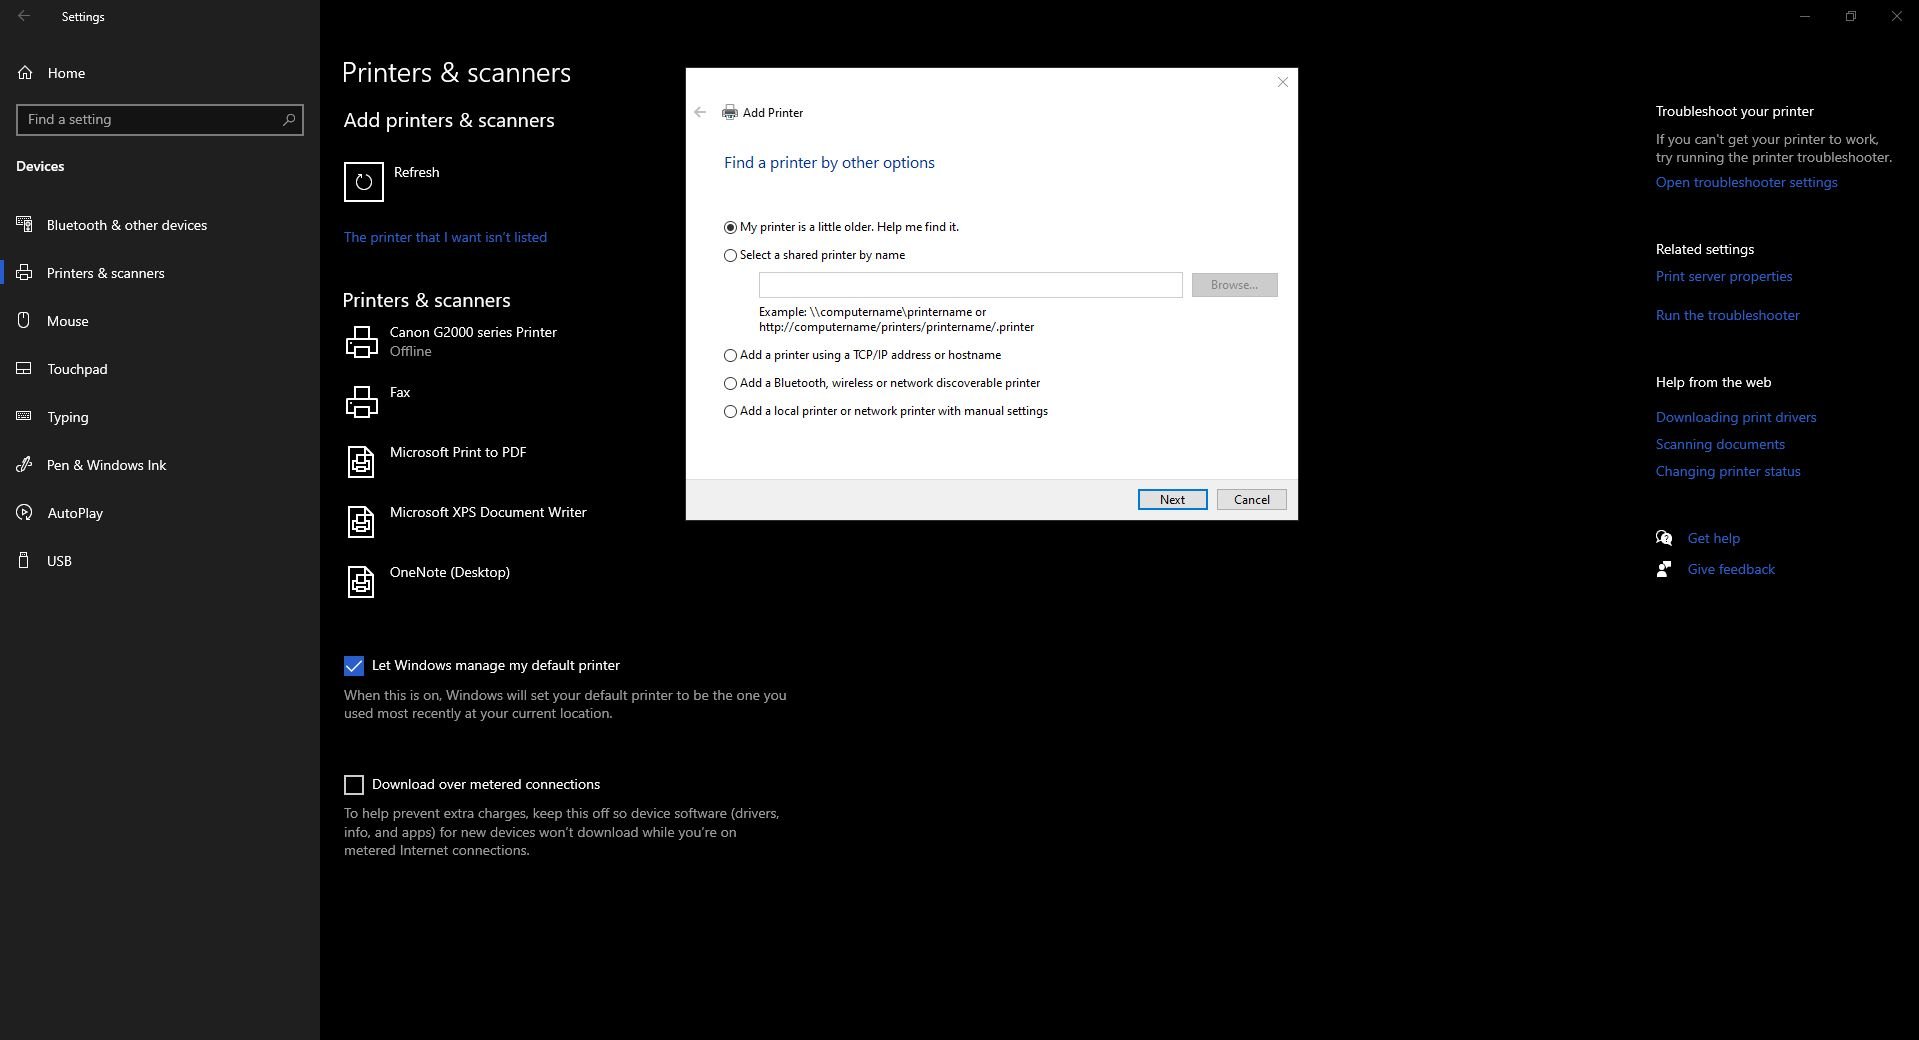
Once your computer detects all nearby devices, select the one you want to use and click on Add device. It will then automatically add your machine, and you can choose it from your scanning options later.
However, if that doesn't happen, click on The printer that I want isn't listed link. Windows will then open a wizard to add your printer. Just follow the instructions to install your device.
Once you've added the hardware, you can open the apps to start your scan. Windows offers two ways of scanning documents; the first is the legacy Windows Fax and Scan app, and the second is the newer Windows Scan app. We will tackle both below.
Windows Fax and Scan
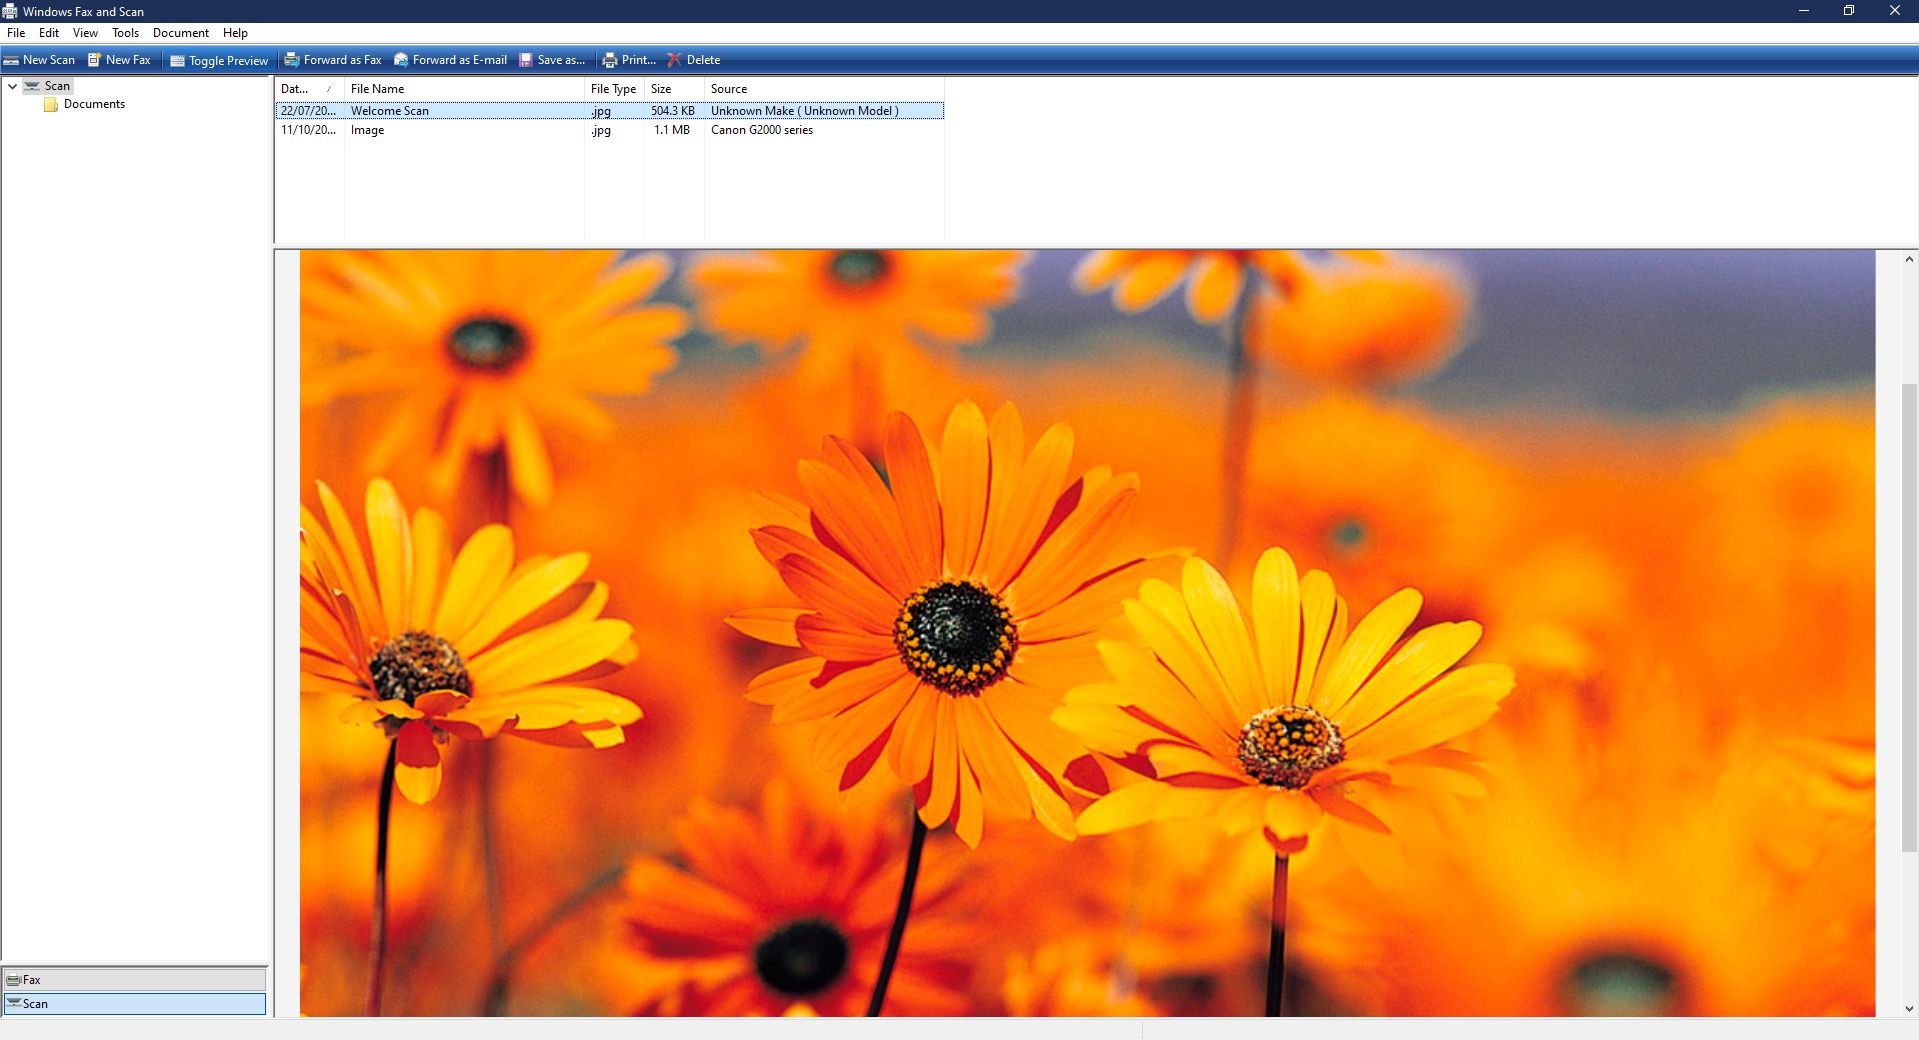
Click on Start, then go to Windows Accessories > Windows Fax and Scan to access the app. In the Windows Fax and Scan window, select New Scan. A New Scan window will then appear. Ensure you've chosen the correct device under Scanner. Otherwise, click on Change… to pick the right one.
Once you've picked your device and have set your scan settings, click on Preview to start scanning and see how your document will appear. And once you're happy with the results, click on Scan to scan and save the image.
The saved image will then appear in the main window of the Windows Fax and Scan app. If you want to access the file, it's usually saved in your Documents > Scanned Documents folder.
Windows Scan
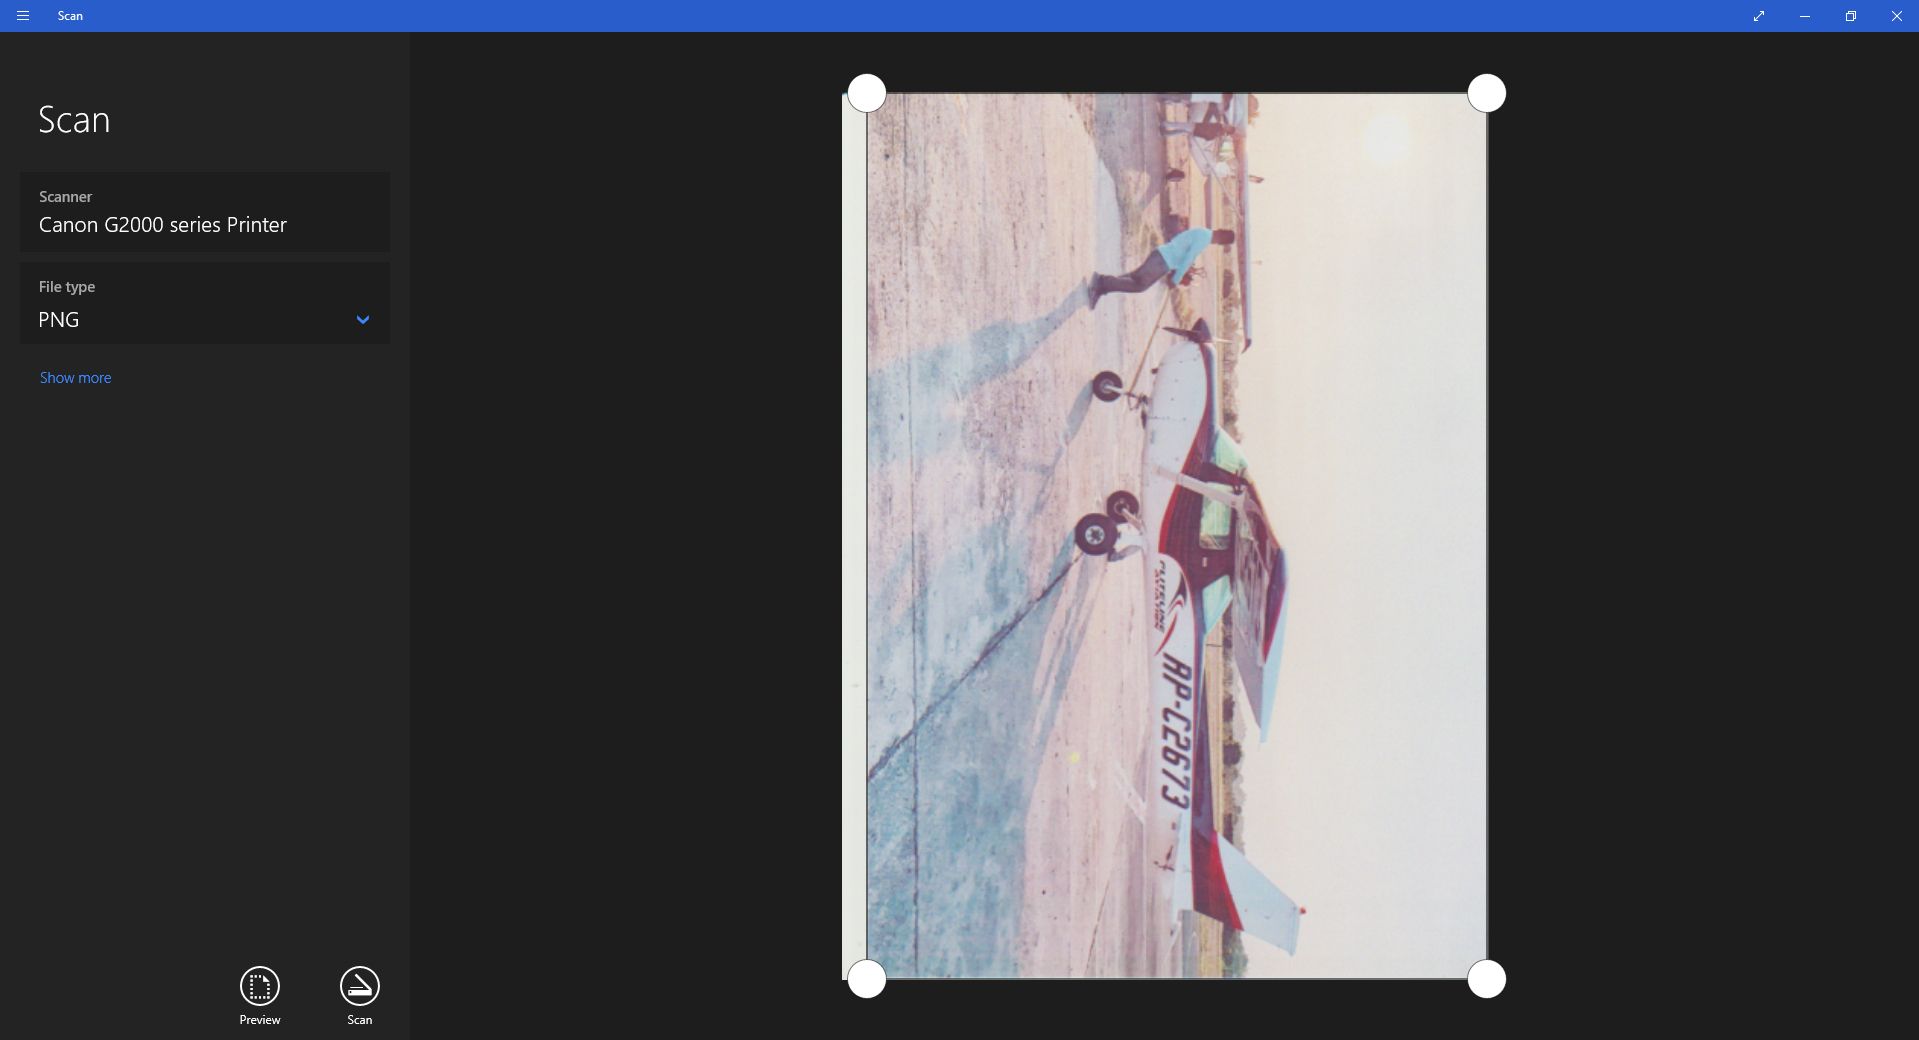
This app isn't usually pre-installed in Windows. You first need to go to Microsoft Store, search for Windows Scan, and then download and install it. Once it's set up, launch it from your Start Menu by clicking on Scan.
A new Scan window will appear. If you have multiple scanners, pick out the correct device, select the File type you want to save your scan, and then press Preview. You will then see your scan in the main window. You can also adjust the edges of your file by dragging and dropping the white circles at the corners of your file.
Once you've finalized your settings, click on Scan. After your file is scanned, the app will show a pop-up at the top of the window telling you the file name of the scan and where it's saved. Click on View to open the file in a photo app, or press Close when you're done. You can access the saved file in your Pictures > Scans folder.
Scanning on a Mac
If you have an Apple computer, you can also scan from any multifunction printer using your device. First, go to System Preferences > Printers & Scanners to check if your multifunction printer is installed on your system. You should see it listed in the left column; otherwise, you need to add it.
Adding Your Printer
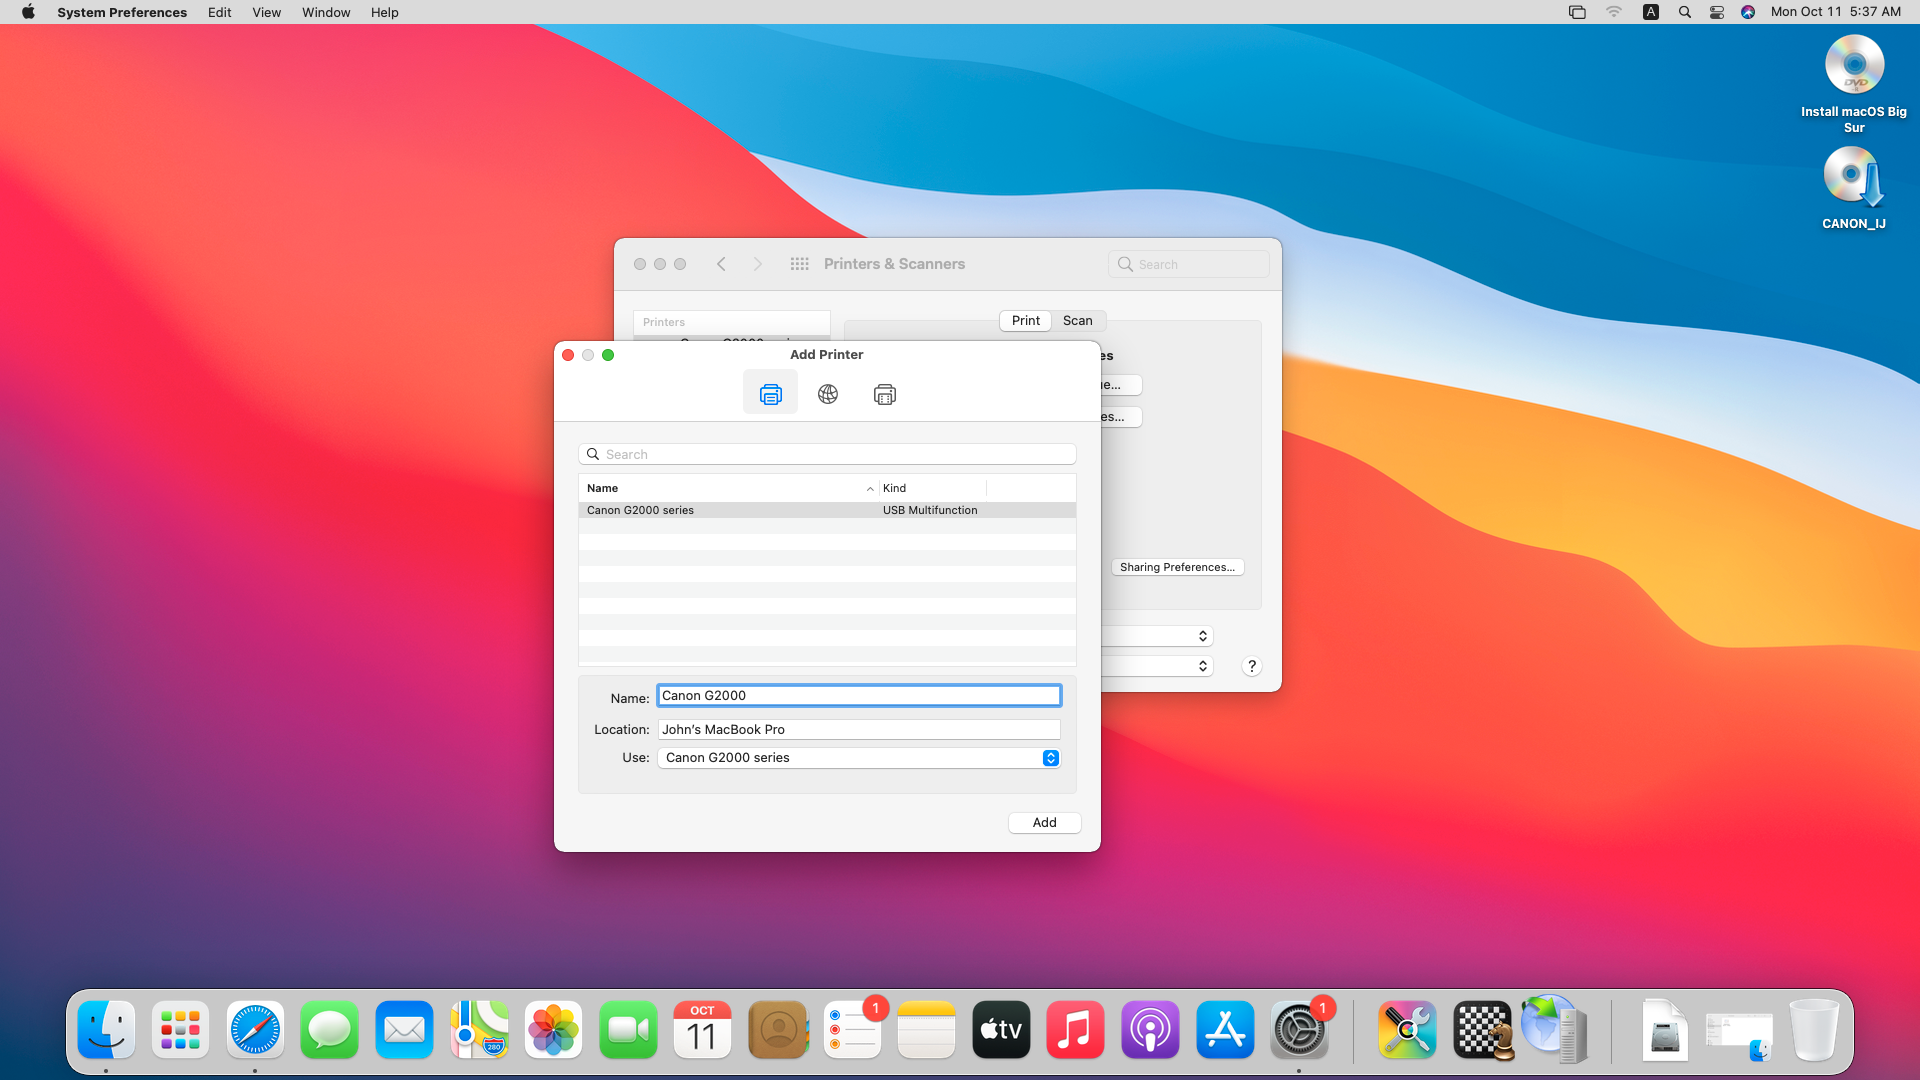
To do so, click on the + sign. An Add Printer window will then appear. If you're using a USB printer, it should appear automatically listed in this window. But if you're using a network printer, you should click on the IP icon and set it up using its network address.
However, if your device is still not found in the Add Printer window, you have to visit your printer brand's website and download the pertinent drivers.
Starting Your Scan
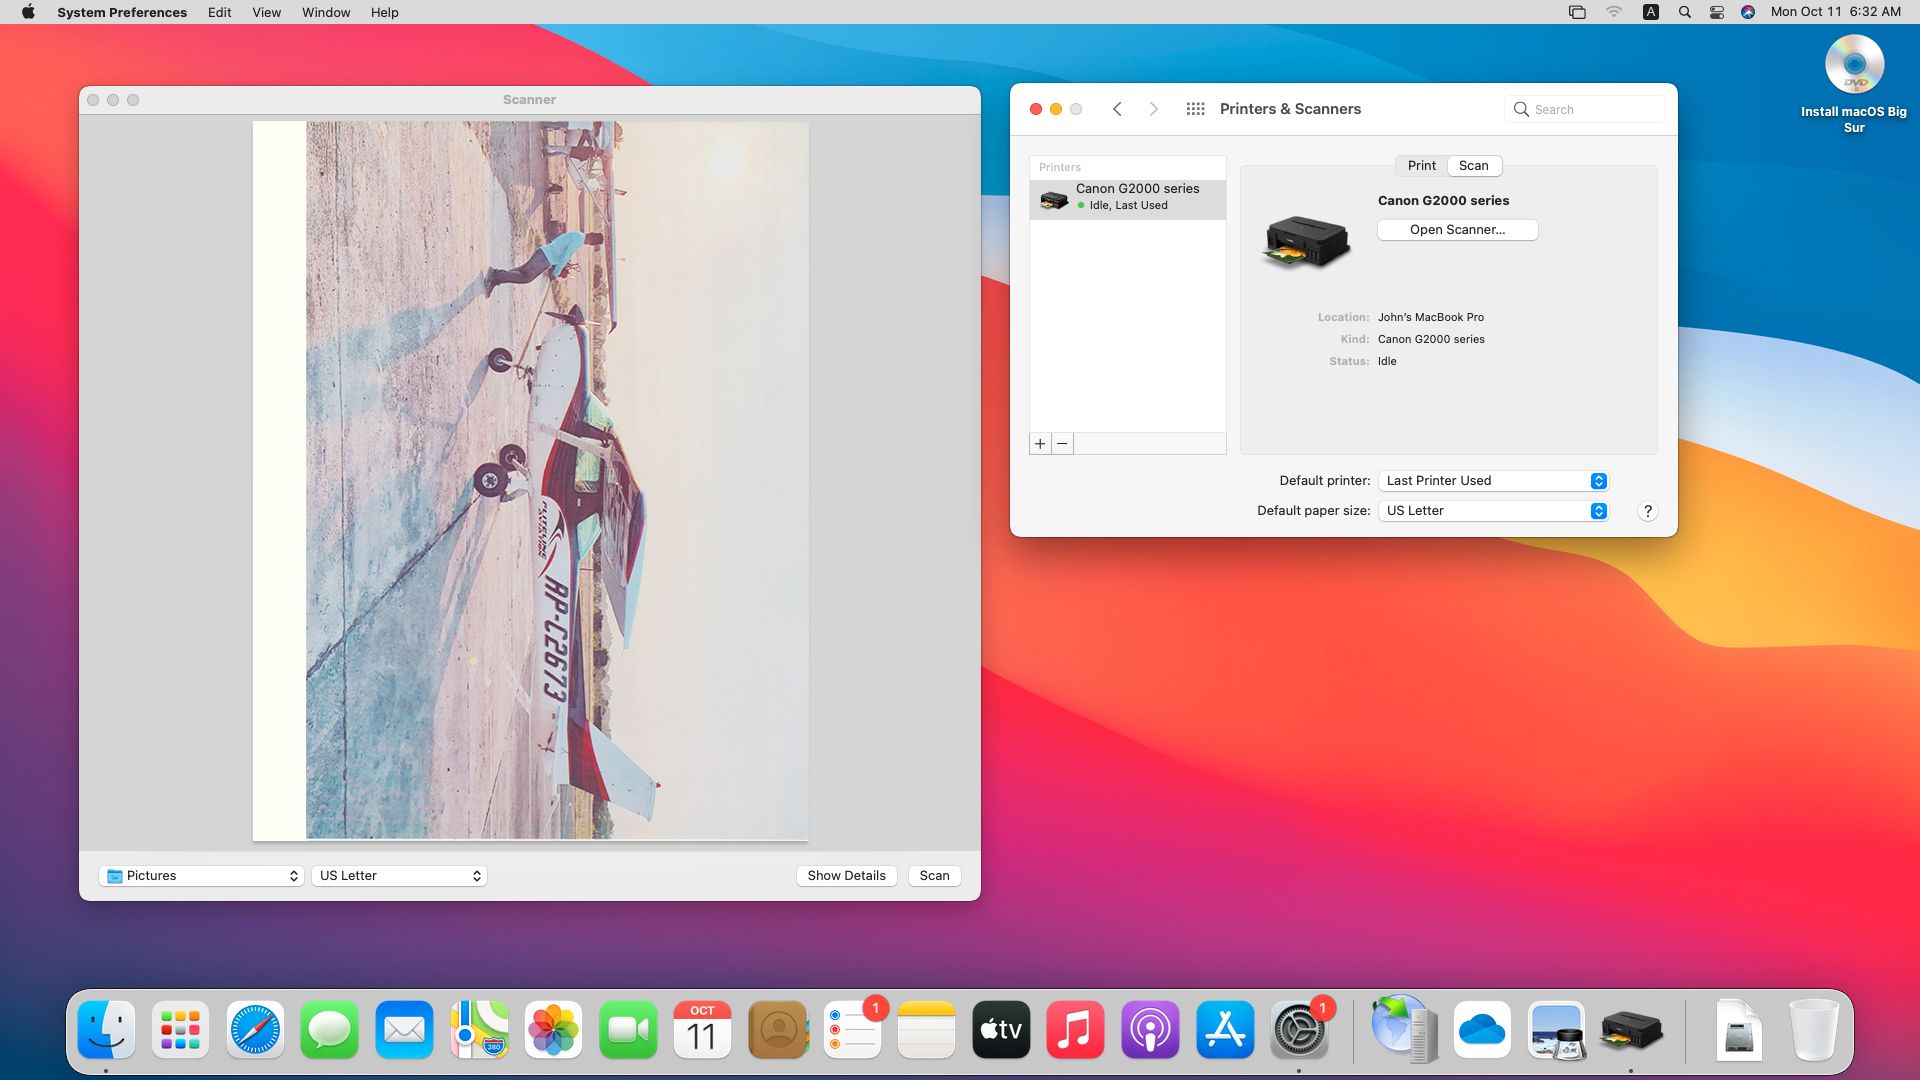
Once your device is installed on your Mac, go back to Printers & Scanners. Select the device you want to use, then click on the Scan tab. You should see your device's name in the main window, then underneath it, click on the Open Scanner… button.
A Scanner window will then open. In the lower bar, select the folder where you want to save your scanned file, pick the paper size of your document, then press Scan. The printer will first execute a preliminary scan to determine the docs it's working with. It will then scan each document it detects and save it as a separate file.
To find the file you've recently scanned, head to the folder you've selected in the previous paragraph.
Digitizing Your Life
It's definitely a good idea to keep digital copies of your most important physical files. These could be your birth certificate, property titles, and contracts. That way, even if you lose the original document, you still have access to their copies for your reference.
However, wherever you're storing these copies, always ensure that it's in a safe place. If you're saving it on your computer or a cloud storage service, ensure it's encrypted. And if you are keeping it on an offline server, secure those drives in a locked safe. That way, your most precious belongings, like your identity, cannot be easily stolen.


