If you’re working on a multi-page document like a brochure or a magazine, you’ll often have to use various common elements across different pages.
That’s where InDesign Master Pages can be indispensable. By enabling you to reuse your basic layouts, they simplify your workflow and make it quicker to achieve the result you’re after.
Read this guide, and before you know it, you’ll have truly mastered Master Pages.
What Are InDesign Master Pages?
InDesign Master Pages are essentially templates you can use within documents. They allow you to reuse layouts, styles, and assets, thereby saving time and effort.
A Master Page might, for example, include a color scheme that’s consistent throughout your document. It may also incorporate page numbers, a logo, and the title of your document, including any styling you have applied.
It’s easy to see how this would be useful when creating something like a brochure or a magazine. Your front and back covers may have unique designs, but the rest of your pages will likely share some common elements.
If you put these common elements into Master Pages, you can apply them throughout your document and avoid unnecessary work.
Working With InDesign Master Pages
By default, when you create a new document, you’ll already have a Master Page to work with in your Pages window.
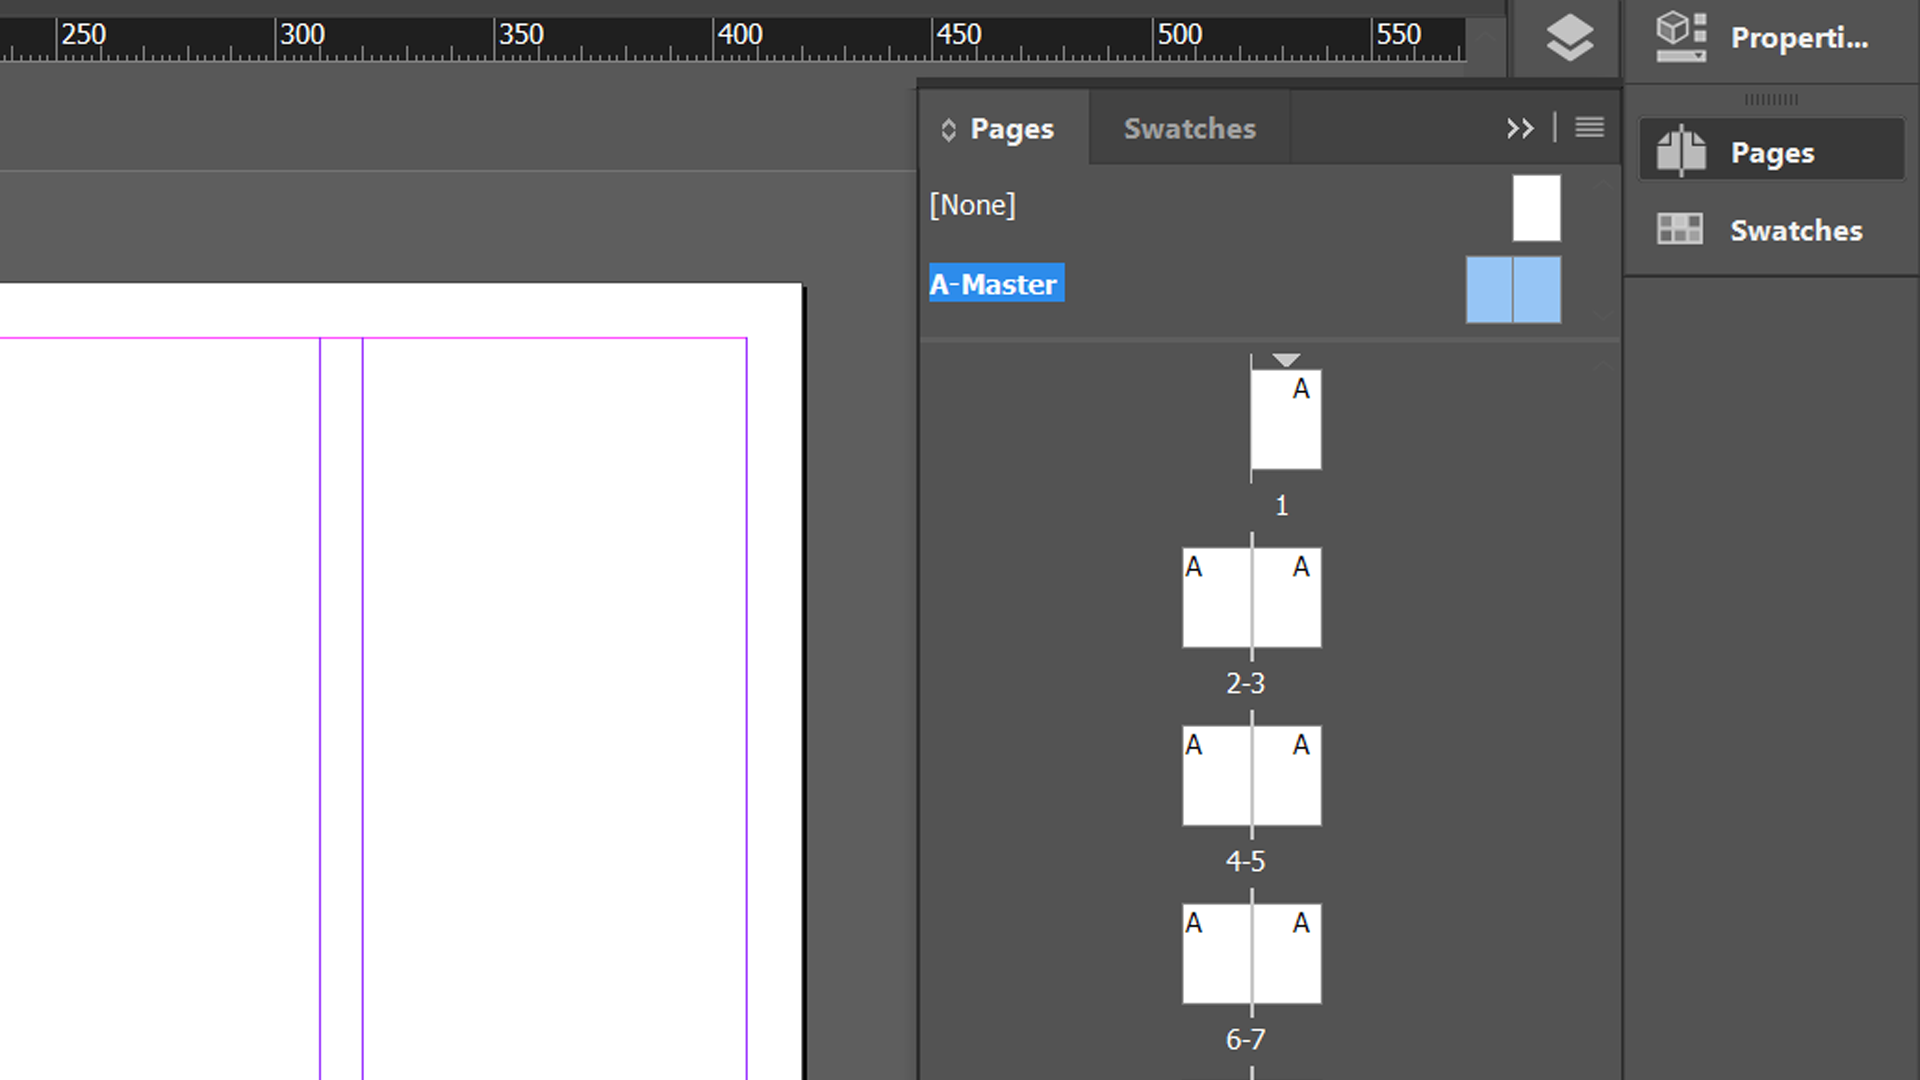
If you don’t have the Pages window open, go to Window > Pages, or hit F12. If you selected Facing Pages when you created your new document, then you’ll have a double-page Master spread. Either way, it will be titled “A-Master.”
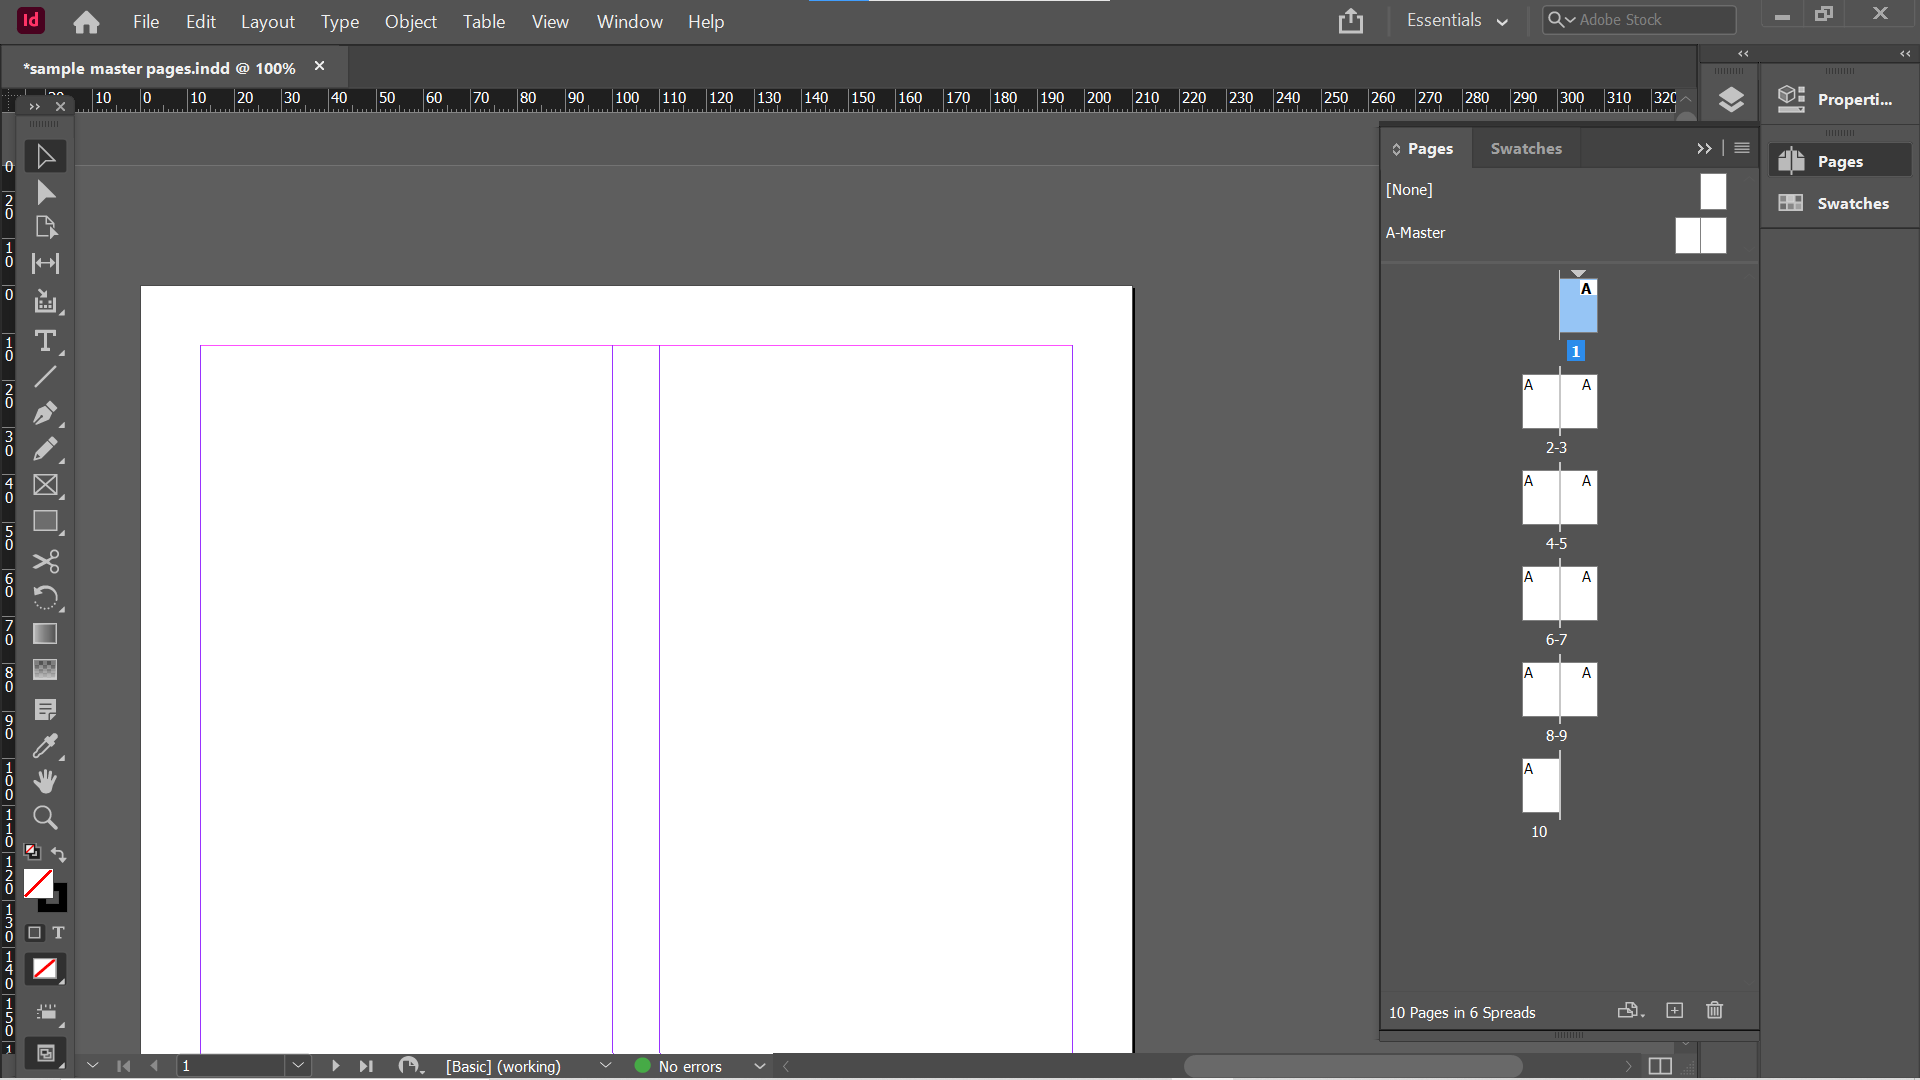
As you can see below, all the pages in our Pages window have the letter “A” on them. This tells us they’re linked to A-Master.
To demonstrate how to work with Master Pages, we’re going to create a very simple magazine layout. The back and front covers will not be connected to Master Pages. Inside, we’ll have two four-page articles, each using a different set of Master Pages.
We’ll begin by creating our first Master Page spread. Double-click on A-Master in the Pages window to select it.
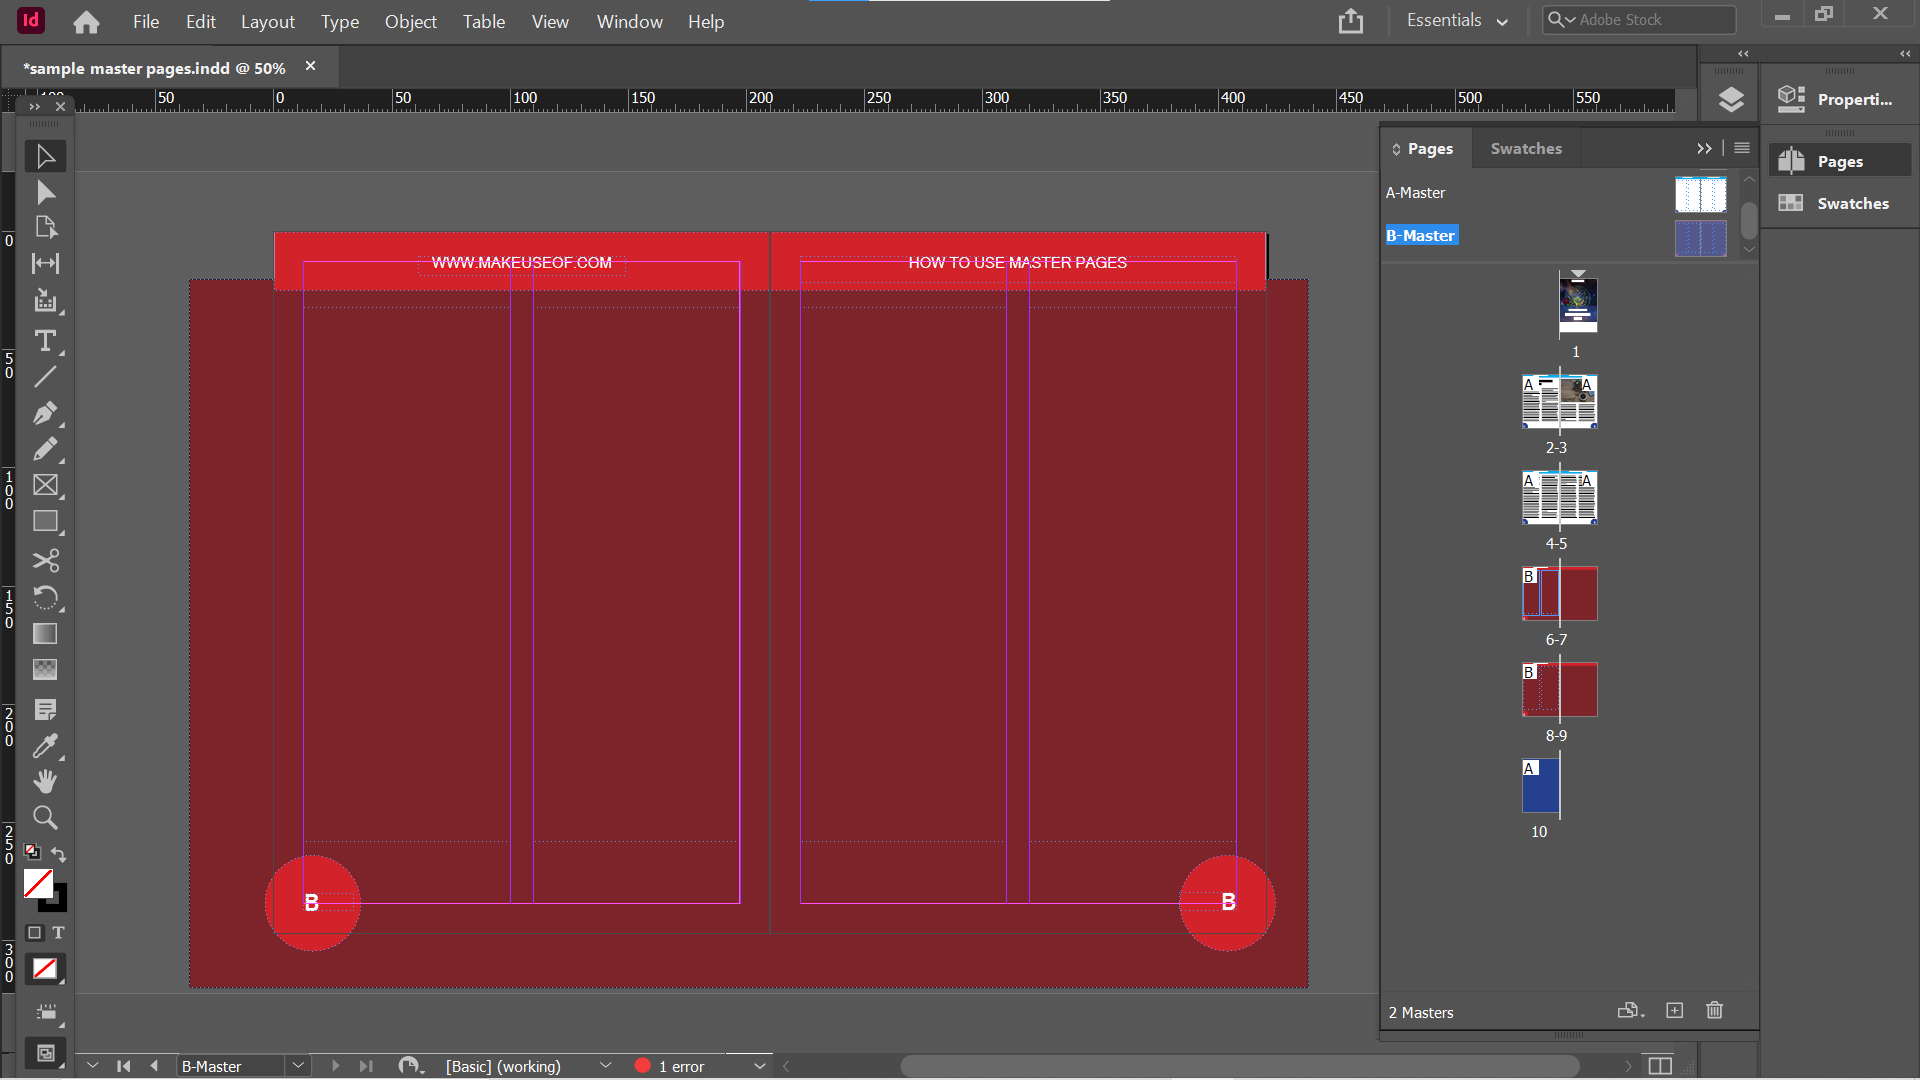
You can now start adding elements to A-Master. We’ve built a simple layout with page numbers in colored circles, a title bar at the top, and two columns on each page.

Return to your main document by double-clicking any of its pages in the Pages window. You’ll see that your new design elements have been added to it.
Note that these elements are locked within the main pages of your document. To make changes to them, you need to head to your Master Pages again.

You’ll also find that Master Page elements are always on the bottom layer. Anything you add while working on regular pages will sit on top of the Master Page items.
Unlinking Pages From InDesign Master Pages
For our purposes, we don’t want our cover pages to use Master Pages, as we want them to have unique layouts. We need to unlink them from the Masters.
To do this, we will apply the [None] template in the Pages window. One way to do this is to click and drag [None] onto the pages you want to unlink from the Master Pages.
Alternatively, select the pages you want to change from the Pages window, then right-click, and select Apply Master to Pages.

Now, choose [None] and the pages you want to unlink. Click OK, and those pages should be blank.

You can now create your cover page. As you can see from our simple design below, our front cover has a layout without any of the Master Page elements included in it.

Overriding InDesign Master Page Items
By default, you can’t edit Master Page items without going to the Master Pages themselves.
You can get around this by right-clicking pages in the Pages window and choosing Override All Master Page Items. The shortcut for this is Ctrl + Alt + Shift + L.

This will unlock all Master Page elements on those pages, so you can move and edit them. For example, that means we can now add text to the columns we set up in our Master Pages.
However, if you override Master Page items this way, it unlocks everything—including parts of your design you probably want to remain locked. That can result in elements moving accidentally, as shown here.

Thankfully, you can also override single Master Page items on a page. Just hold Ctrl + Shift on Windows or Cmd + Shift on Mac, and left-click on locked Master Page elements to make them editable.
By doing this, you can edit the parts of the page you need, all while leaving things like page numbers and titles untouched.
Adding More InDesign Master Pages
You can use more than one Master in a document. We’re going to use this feature to create a second article layout with a different color scheme than our first.
To add a new Master Page, right-click the Master Page areas in the Pages window. Alternatively, click the menu button in the top-right of the Pages window (the four horizontal lines). Select New Master.
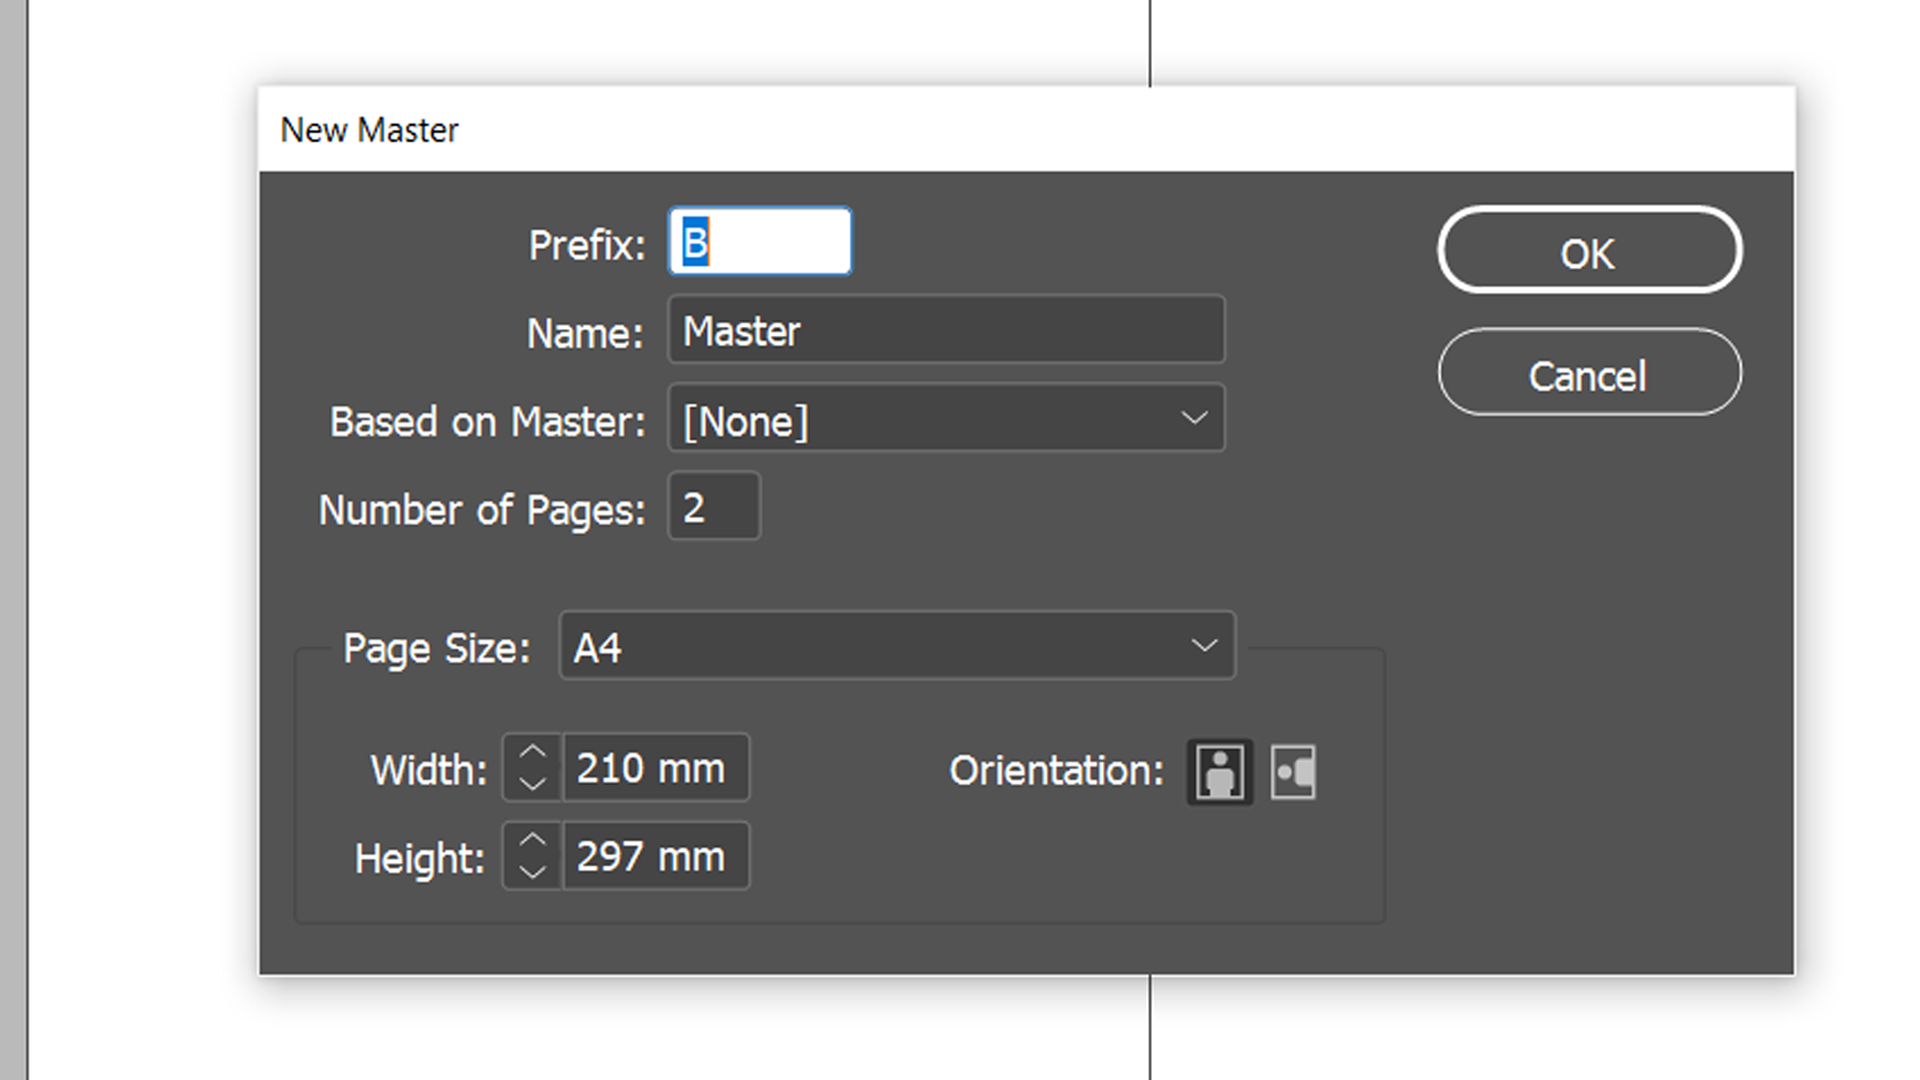
Now, you choose a prefix, a name, whether it’s based on another Master Page, the number of pages, and the page size. If you base your new Master Page on [None], it will be blank.
If you choose to base a Master on another Master, InDesign will bring in all the Master items just as it would with a regular page. That means all A-Master items in B-Master, for example, will be locked until you override them. It also means changes to A-Master will be reflected in B-Master.
You can also create a copy of a Master by right-clicking on it in the Pages window and selecting Duplicate Master Spread. In this case, it will create a copy without any kind of dependency, so you can edit it immediately.
That’s what we’ve chosen to do here. We’ve created a new color scheme and applied B-Master to our remaining pages.
Reusing InDesign Master Pages In Other Documents
Although there are some great InDesign templates available for free online, you may want to reuse your own designs instead. You can do that by importing your Master Pages into new documents.
To bring in Masters from other documents, open the menu in the top-right of the Pages window. Select Master Pages > Load Master Pages.
Now, choose the document that holds the Master Pages you want to import. You’ll be prompted to rename them if there are any conflicts.

You can also turn any pages into a new Master. Select any pages you want to include in the Pages window, and then open the menu using the button in the top-right.
Click Master Pages > Save New Master. InDesign will add a new Master to your Pages window.

Create Layouts Faster With InDesign Master Pages
For simple one or two-page documents without repeated design elements, you may not need to use Master Pages. But they really come in handy when you start to create longer, multi-page layouts.
If you need to use the same parts of a layout throughout your document, Master Pages enable you to do it quickly and with minimal effort.
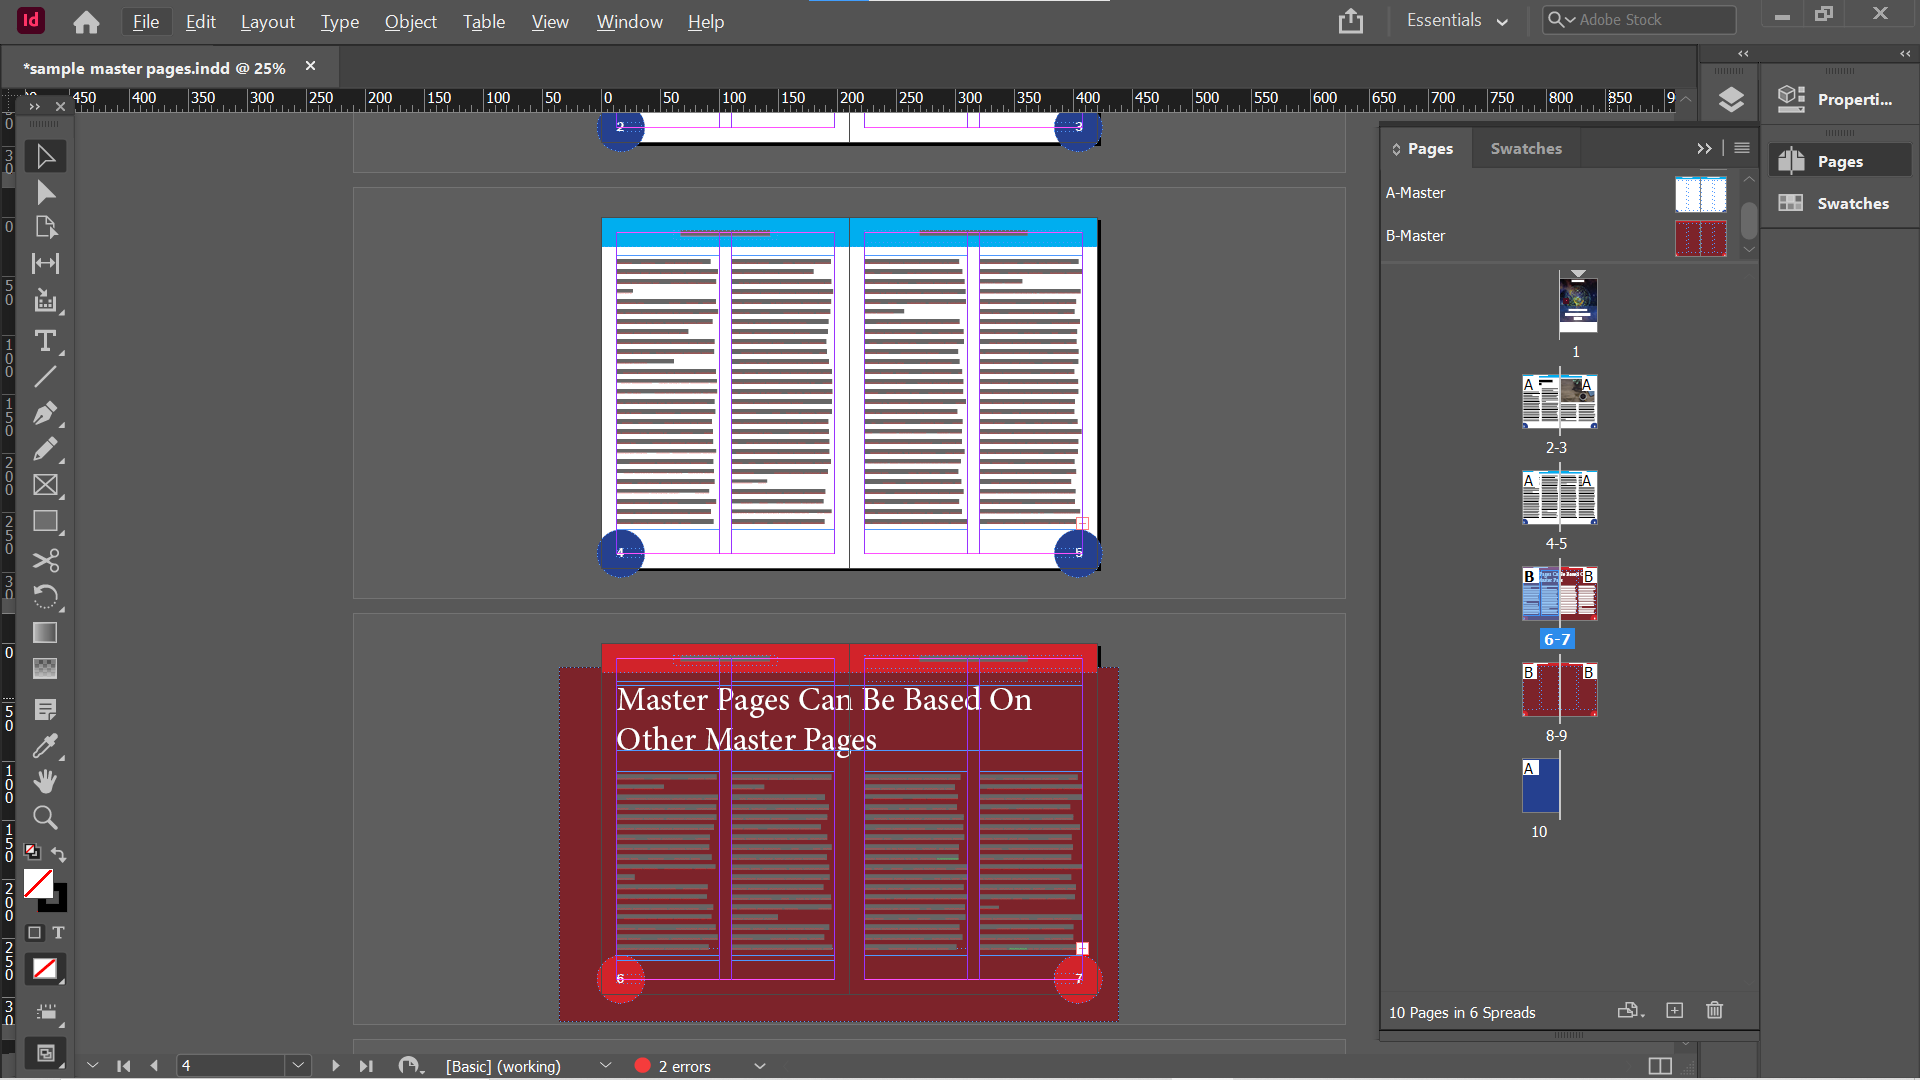
You can create Master Pages based on other Master Pages, too. That means you can layer them and create dependencies. And if you need to override Master Page items, you can do it one at a time or unlink everything all at once.
By using all of these techniques together, you can easily produce large documents without repeating the same actions over and over. It can easily improve your InDesign workflow, saving you a substantial amount of time.
Image Credit: Anthony Shkraba/Pexels

