PsExec is a utility tool that allows system administrators to control a computer from a remote location. It’s a command-line interface that requires no software installation like some of the popular remote administrative tools.
You’re definitely wondering how this is possible, right? In this article, you’ll learn how to download and install PsExec, how to launch it, and some basic commands to get you started. Without much ado, let’s dive in!
What Is PsExec?
PsExec is a versatile system administrative tool from Microsoft that you can use to remotely access a target host. The utility tool is part of Sysinternals Suites created by Mark Russinovich. Its main purpose is to help system administrators perform remote maintenance tasks and execute commands on the target host. As a command-line interface, PsExec only requires you to provide the target address, user detail, and password to gain access to the targeted computer.
Unlike Telnet and Remote Desktop Protocol (RDP), PsExec won’t ask you to install a client program on your PC or another software on the remote host either. PsExec can redirect the input and output of console applications.
For example, if you remotely access a computer with IP address 192.168.79.32 and run an ipconfig command on PsExec, i.e.
Psexec 192.168.79.32 ipconfigYou’ll see the ipconfig output (i.e. the TCP/IP configuration of the remote system) on your personal computer as if you ran the command on the localhost. This capability makes PsExec different from many Windows administrative console tools.
How to Install and Set Up PsExec
PsExec doesn’t require the installation of any client software and no advanced set up on the remote host before connecting. So, if PsExec doesn’t require any settings like other traditional administrative tools, how does it work?
Downloading PsExec
PsExec is just a command line utility tool. All you need to do is to download the PsTools suites on the localhost. It’s a ZIP file available at Sysinternals.
After downloading, extract PsTool.zip. To do this, right click on the ZIP file and select Extract All from the menu.
Installing PsExec
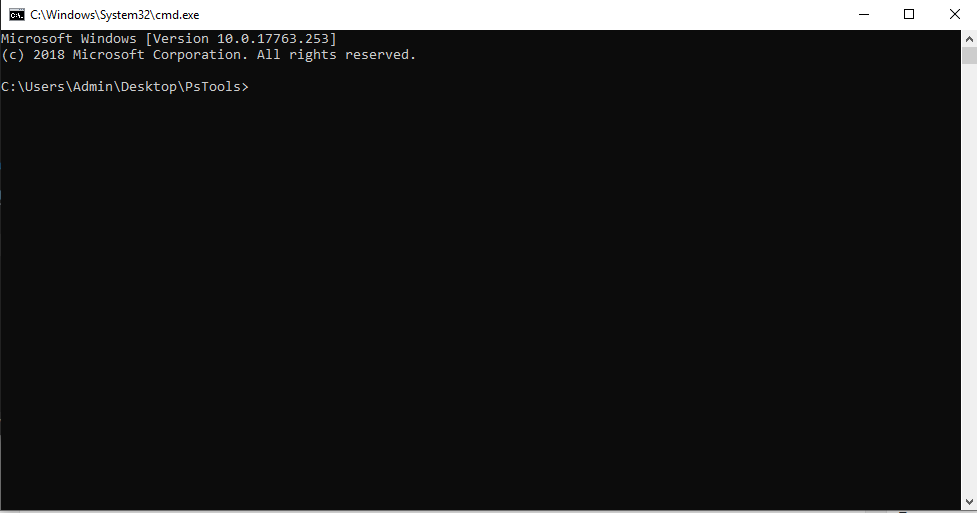
Once you have PsExec downloaded and extracted on your computer, open the folder where the extracted file is located. Replace what’s in the navigation bar at the top of the extracted folder with CMD and press Enter. This process will open a command prompt window in the PsExec folder.
Running PsExec and Connecting to a Remote Computer
Once you have PsExec downloaded on your remote computer, the next step is to set it up for connection to a target host. For PsExec to run and connect to a remote host, there are three basic prerequisites you’d need to put in place. These are:
1. Turn on File and Printer Sharing
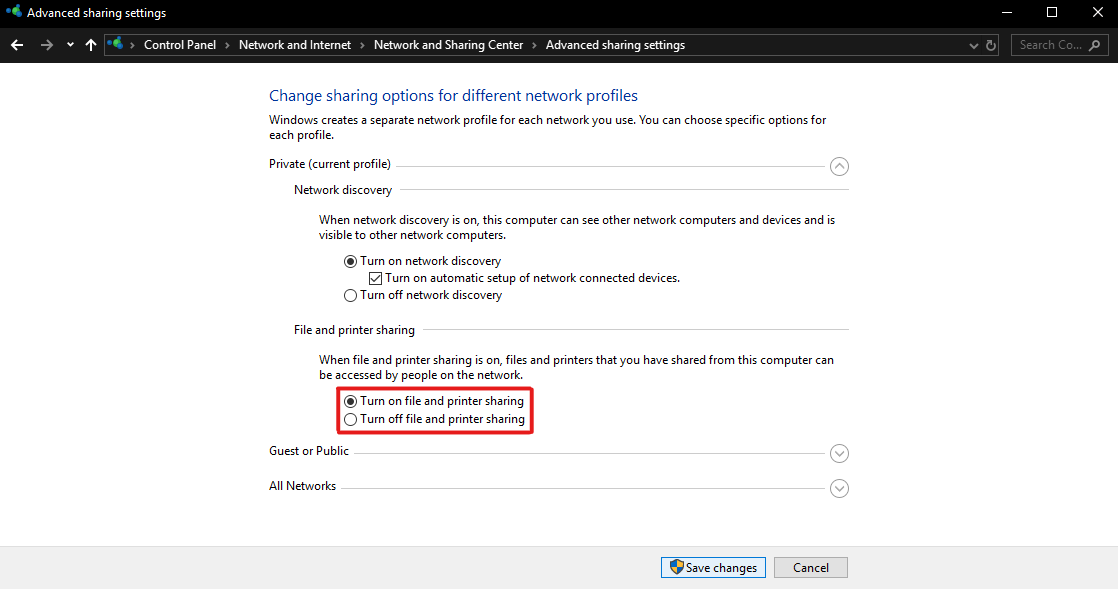
File and Printer Sharing must be enabled on both the local and remote host. To enable File and Printer Sharing, open Windows Settings > Network & Internet and scroll to Network and Sharing Center.
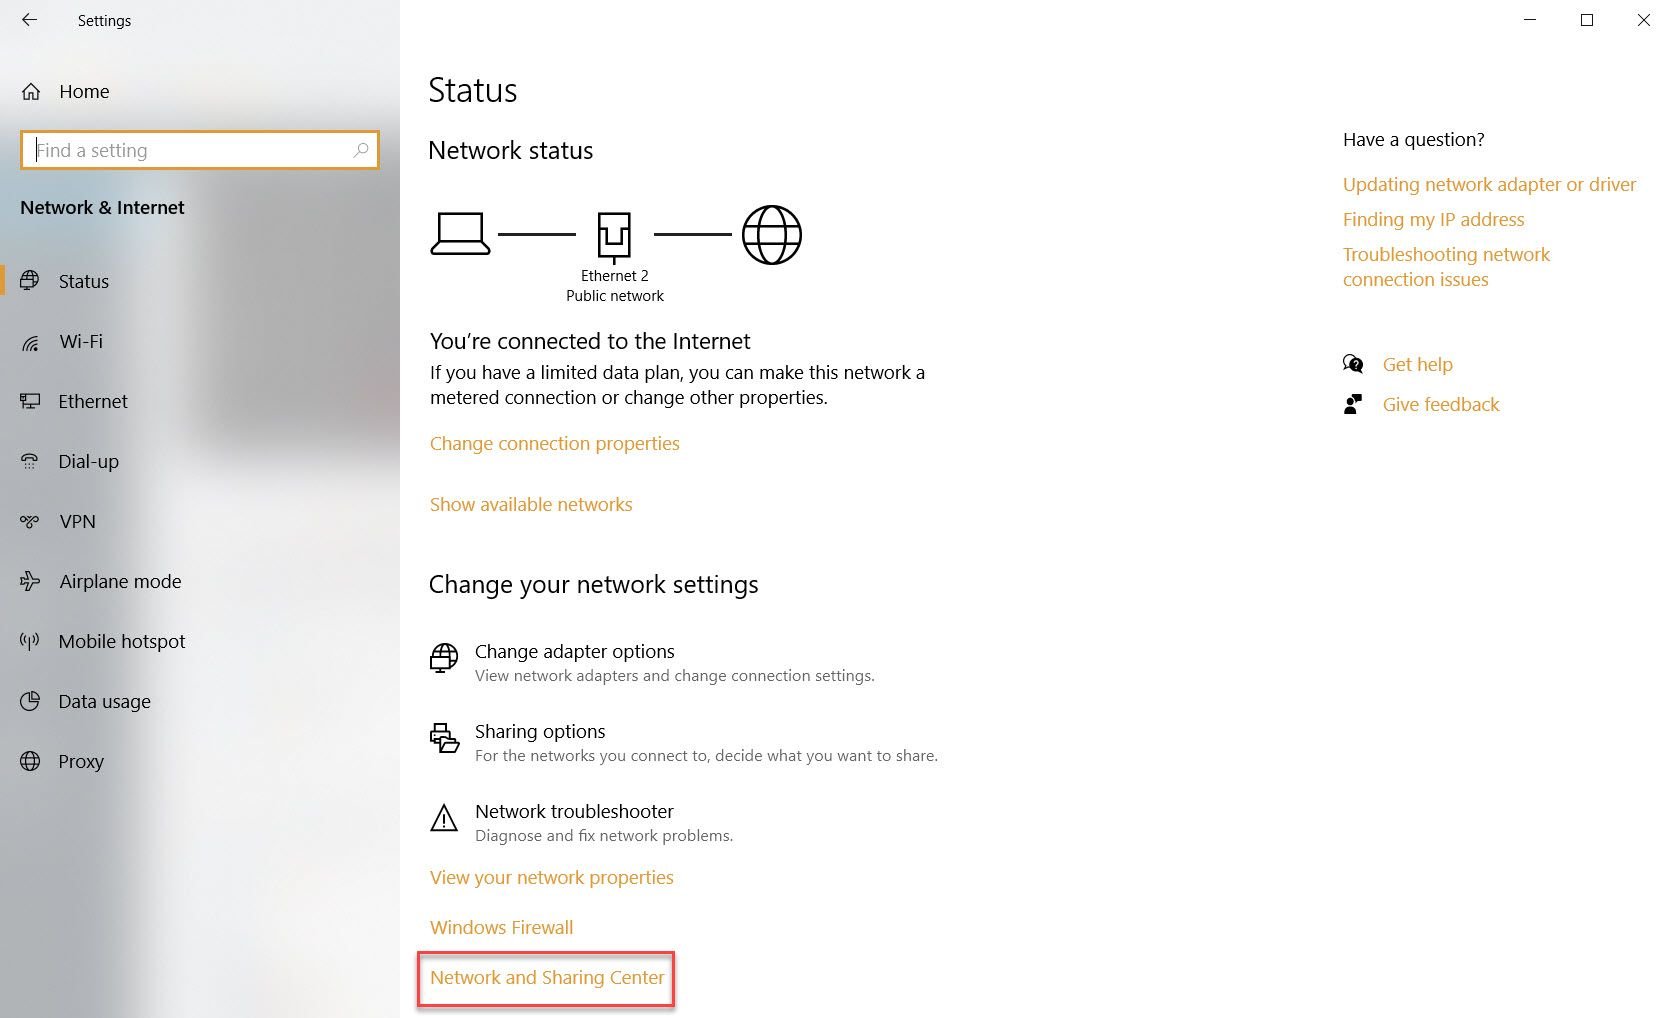
On the left side of the opened window, click the Change Advanced Sharing Settings. Select Turn on File and Printer Sharing and save changes.
2. Enable Administrative Share ($ Admin) on Remote Host
The remote computer must have its administrative share ($ admin) enabled and set up correctly to provide access to its windows folder.
Administrative share ($ admin) allows a system administrator to manage multiple computers on a company network or workgroup by accessing drives and folders within them.
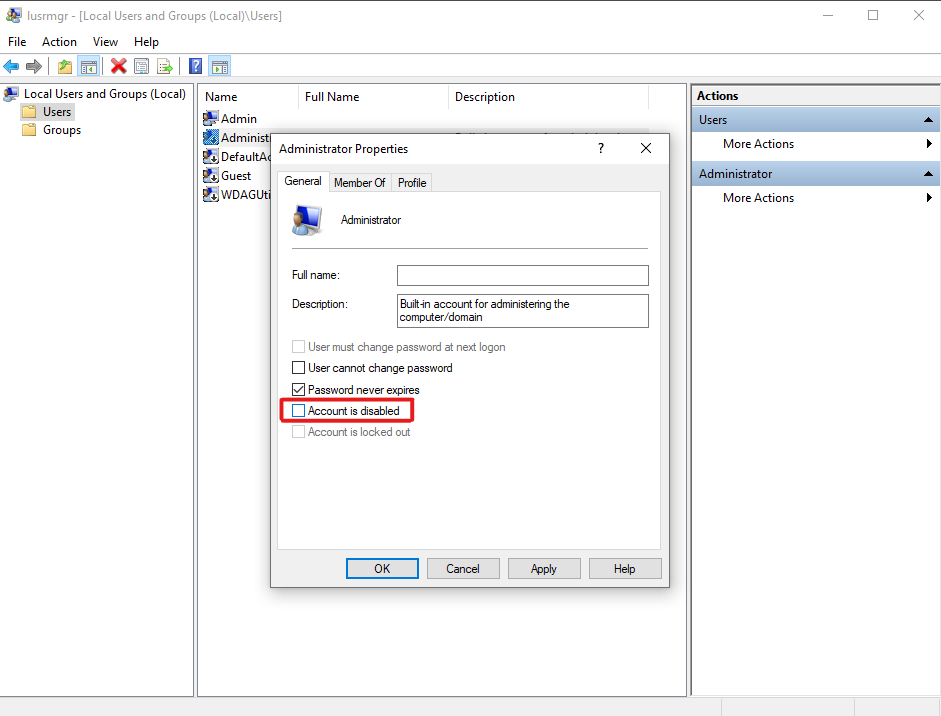
To enable administrative share ($ admin) on the remote computer, press the Win+r key, type lusrmgr.msc, and press OK.
In the new window, open the Users folder. Right click on Administrator and select Properties.
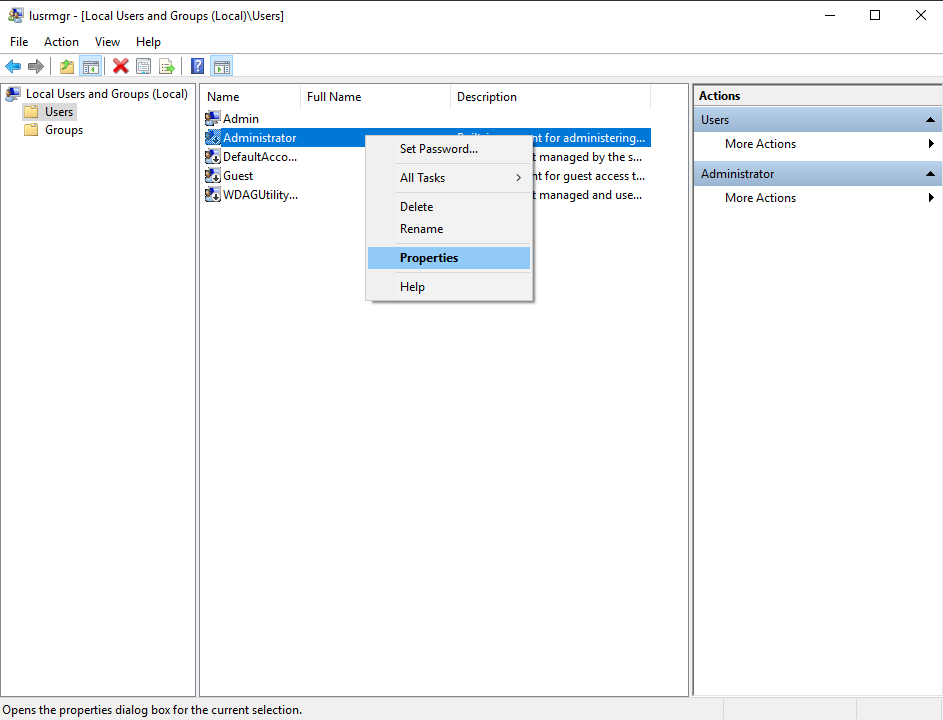
In the Properties window, uncheck the Account is disabled checkbox and click OK. Right-click Administrators again and click Set Password to set your account password.
3. Get the Administrator’s Details
Have the correct user credential of the remote computer, i.e. the IP address, the administrative account username, and password.
How to Use PsExec?
For PsExec to work correctly, its syntax needs to be exact. Therefore, you need to understand the way it works and type commands as intended.
So, to access a remote host, you need to provide the target host credentials (the IP address, username, and password) with your preferred commands.
For example, to run ipconfig on a remote system with an IP address 192.168.89.323 and password ‘12345’, you can open a PsExec CMD console, and enter:
C: PsExec 192.168.89.323 –u Administrator –p 12345If your inputted command successfully executes on the remote system, it will transfer the text output to your command window.
Basic PsExec Commands for New Users
We believed that so far you’ve understood what PsExec is and the correct way to connect a local system to a remote system. So, for new users, using the PsExec tool can be a bit confusing because you need to follow the syntax for it to work. Here are basic commands every PsExec users need to know.
To Launch Command Prompt Remotely
C: psexec windows cmdRunning the command above in PsExec will launch another command-line interface in the current window. This interface, however, will enable you to enter commands on the remote system as if you’re typing directly on the computer.
After successfully executing CMD command, you can easily run other commands like dir to list a folder’s contents, mkdir to create a new folder, or ipconfig to get the remote system network configuration.
To Install a Program on the Remote Host
C: psexec Desktop7743 -c “E:filedocumentCCleaner.exe” CMD /SThe above script is used to install CCleaner on the remote computer Desktop7743. The Syntax -c is a command used for copying the CCleaner program from the local host to the remote computer while the CMD is for launching command prompt, and /S is a command used for enabling a silent install for the CCleaner.
To Run a GUI Application on the Remote Computer
psexec -i emote computer calculatorAs a default setting, PsExec does not launch GUI programs on the remote computer. However, with the help of the -i switch, you can launch a GUI application on the remote computer screen.
For example, if you need to open the calculator app on the remote computer, all you need to do is to execute the calculator.exe with the -i switch, and PsExec will bring it up.
Getting More Familiar With the PsExec Interface
PsExec can seem intimidating. But, the more you interact with the command-line interface, the more proficient you will be with it.
If you’re eager to go deeper and get familiar with the syntax and commands used for executing PsExec operations, you should learn more about the Windows command-line interface.

